
Ross Barrett
Ross Barrett is a project architect with HLM architects working Passivhaus designs for Scotland's Housing Expo. Here he shares an ongoing diary of the construction process.
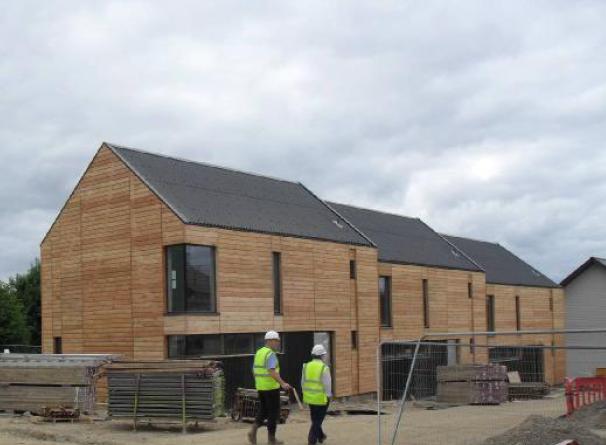
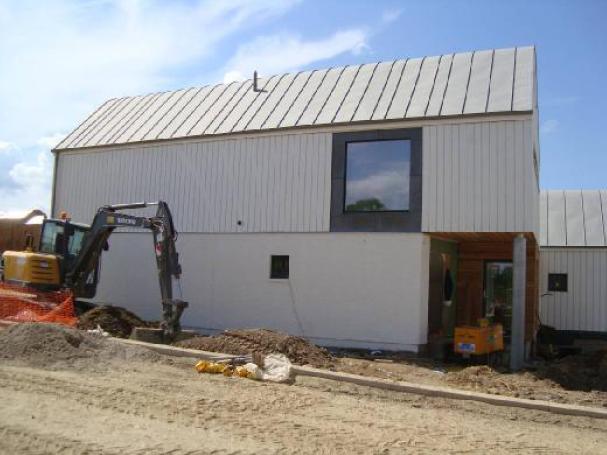
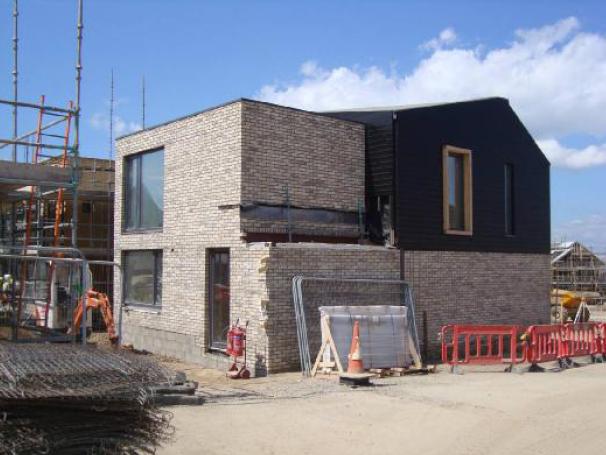
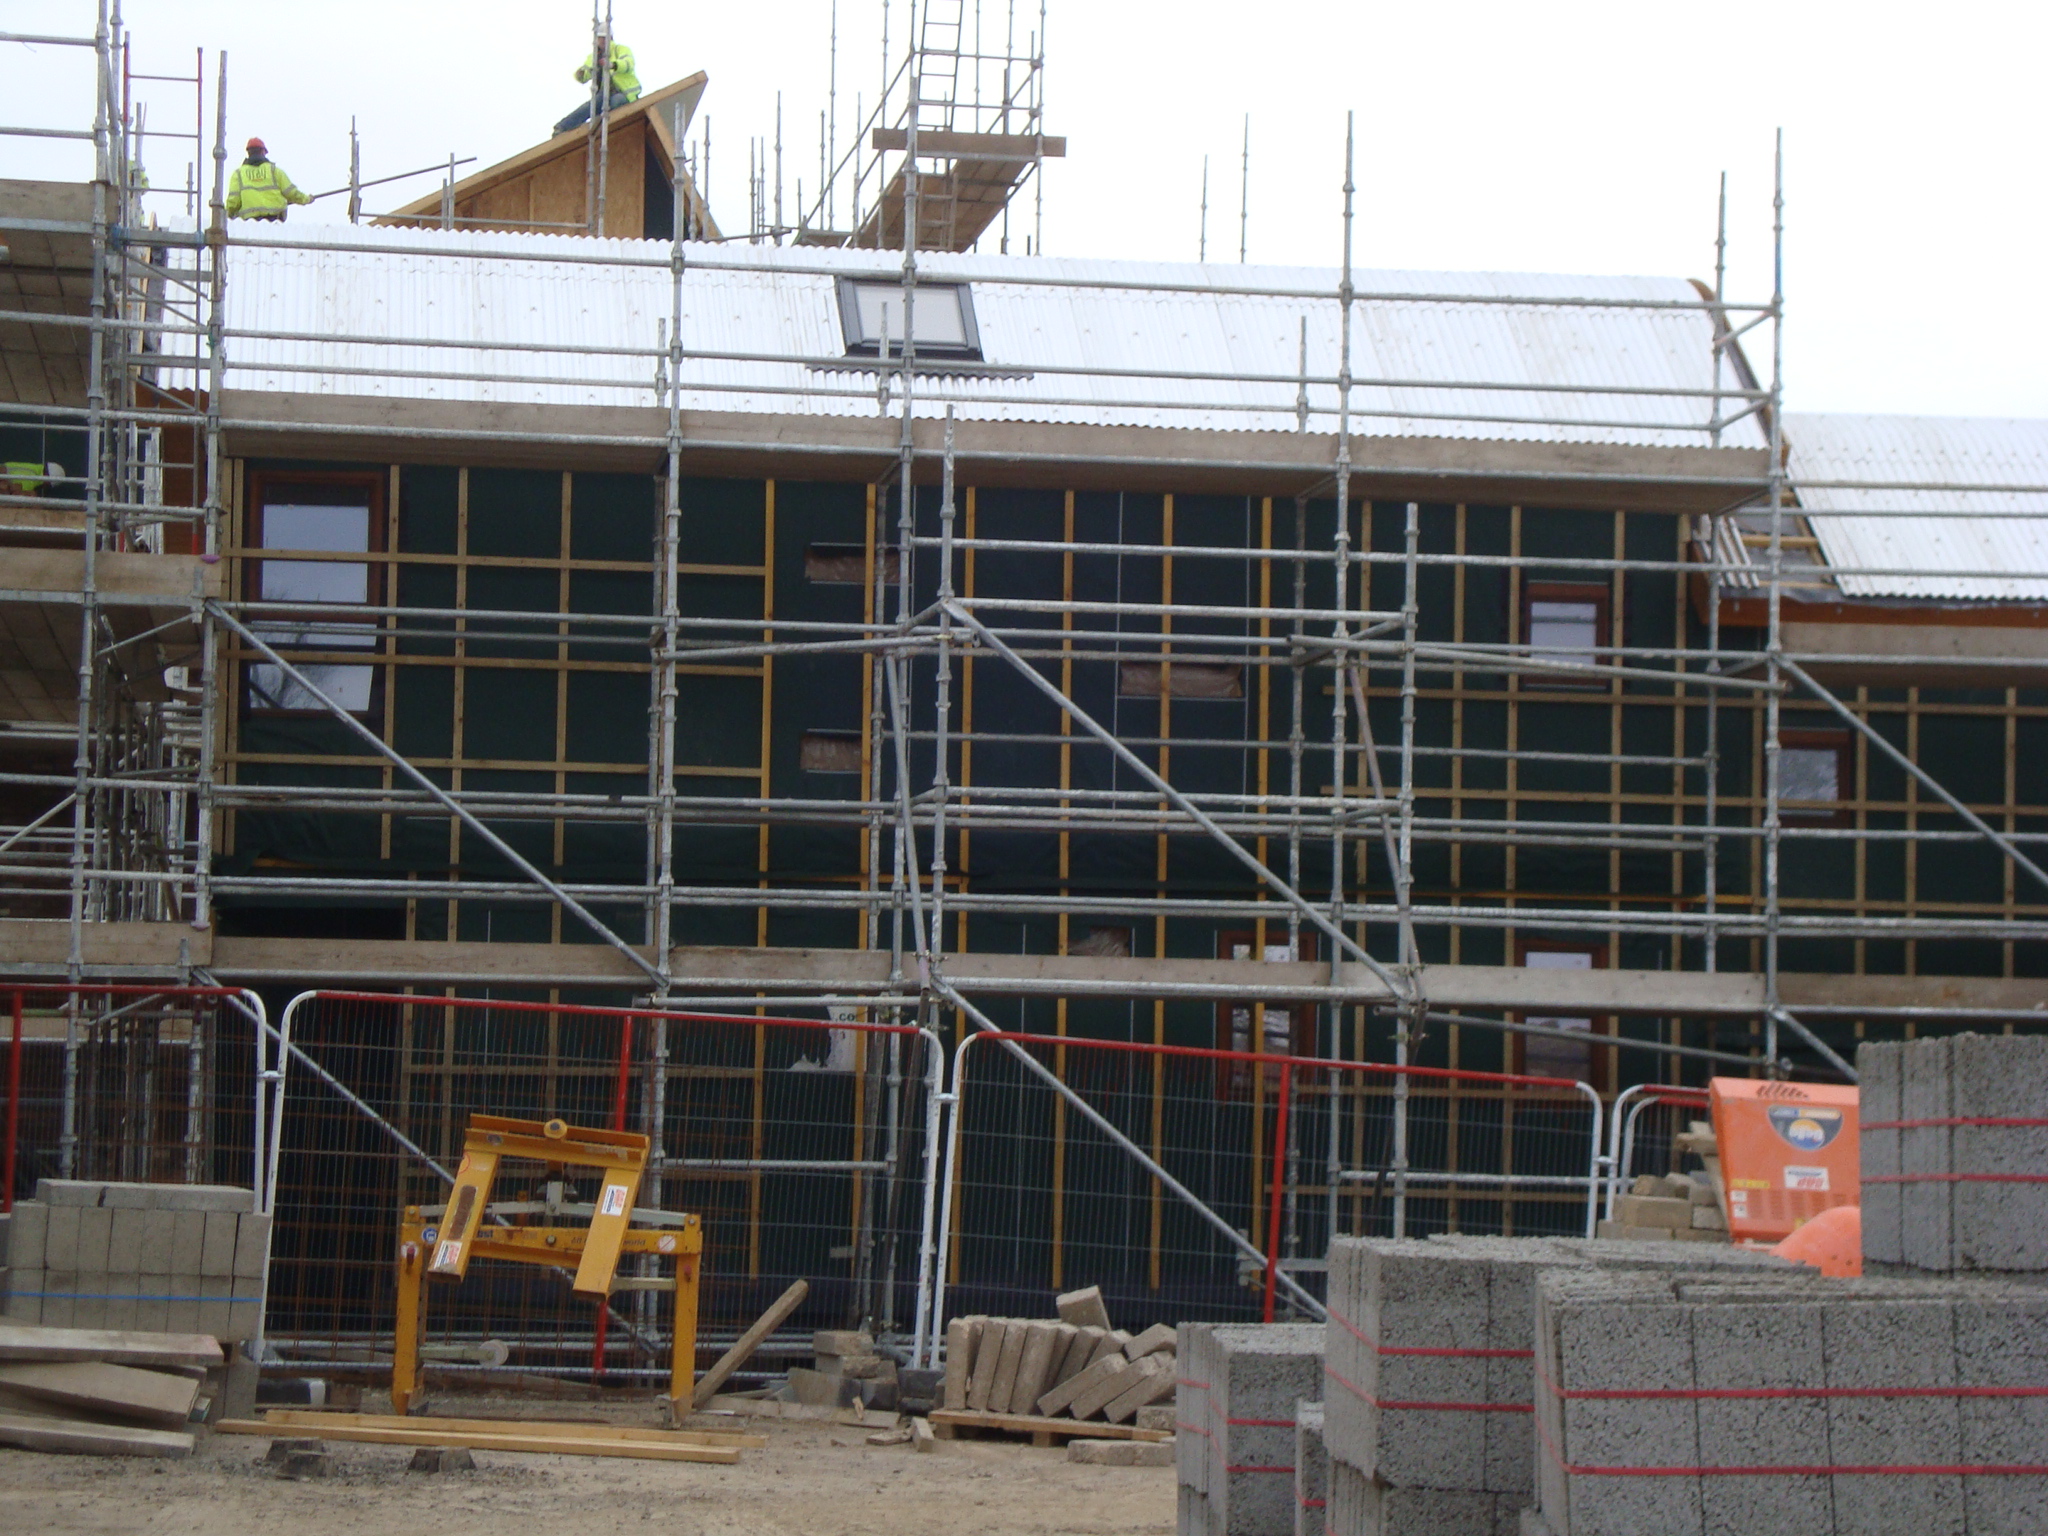
Scotland's Housing Expo: Scaffold down...
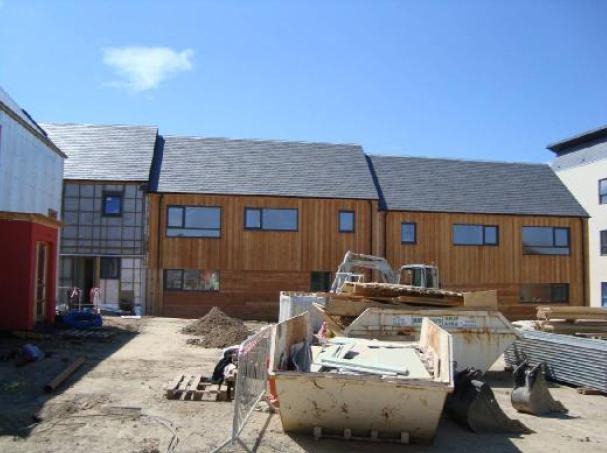
July 26th, 2010Plot 11/12 - Scaffold down on North Street elevation
Trevor Black – Plot 13
Richard Murphy – Plot 14
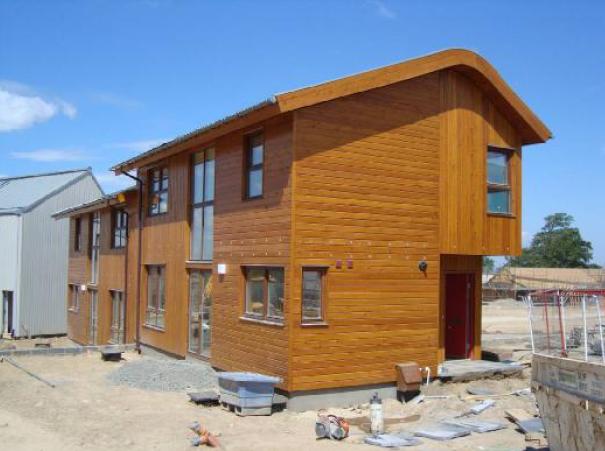
Rural Design – Plot 17
Brennan + Wilson – Plot 18
Joseph Thurrott – Plot 19
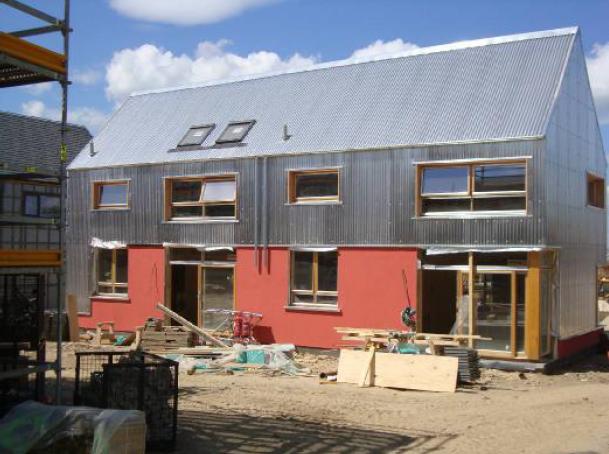
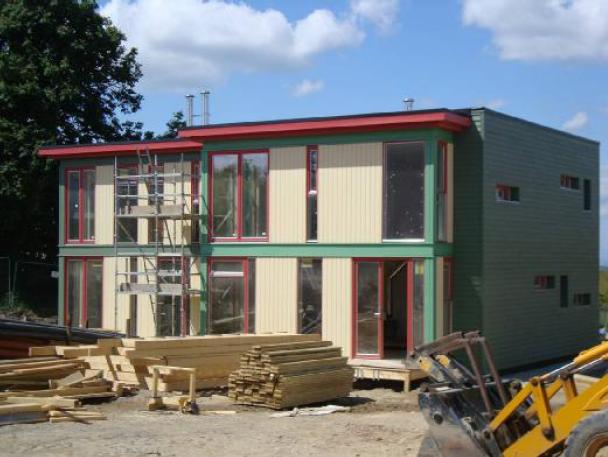
Nord – Plot 2
Malcolm Fraser – Plot 27
Highland Council – Plot 3
John Gilbert – Plot 4.1
Andrew Black – Plot 4.2
David Blaikie – Plot 4.3
JM Architects – Plot 5
Graham Mitchell – Plot 9
Windows, Doors and Pressure Tests
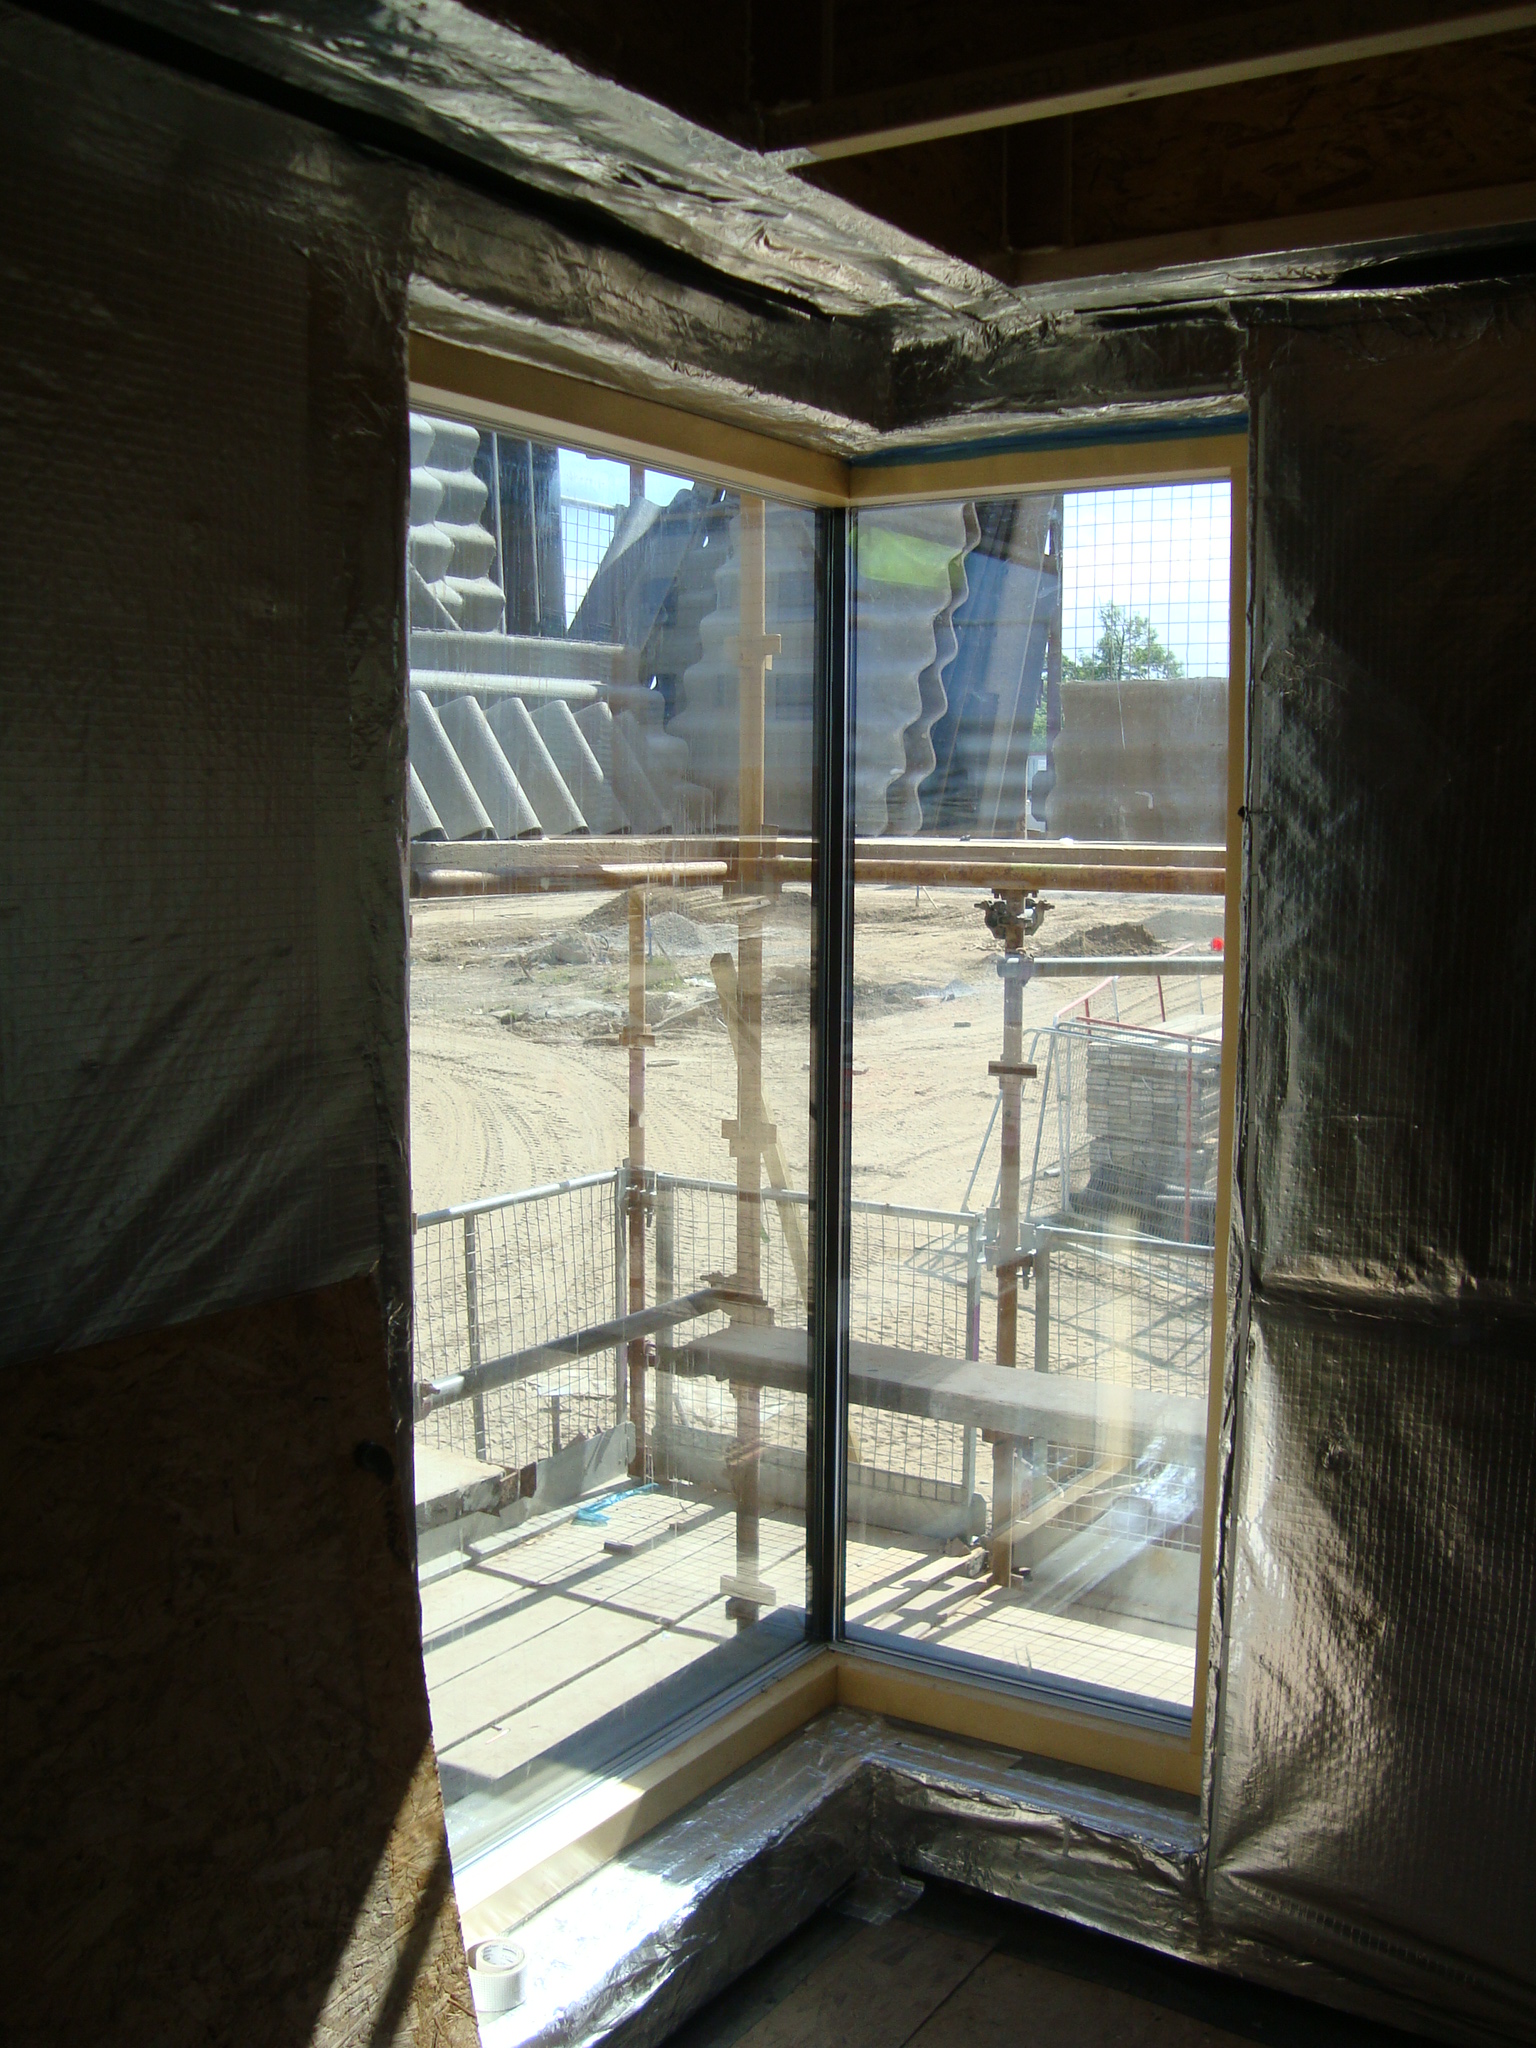
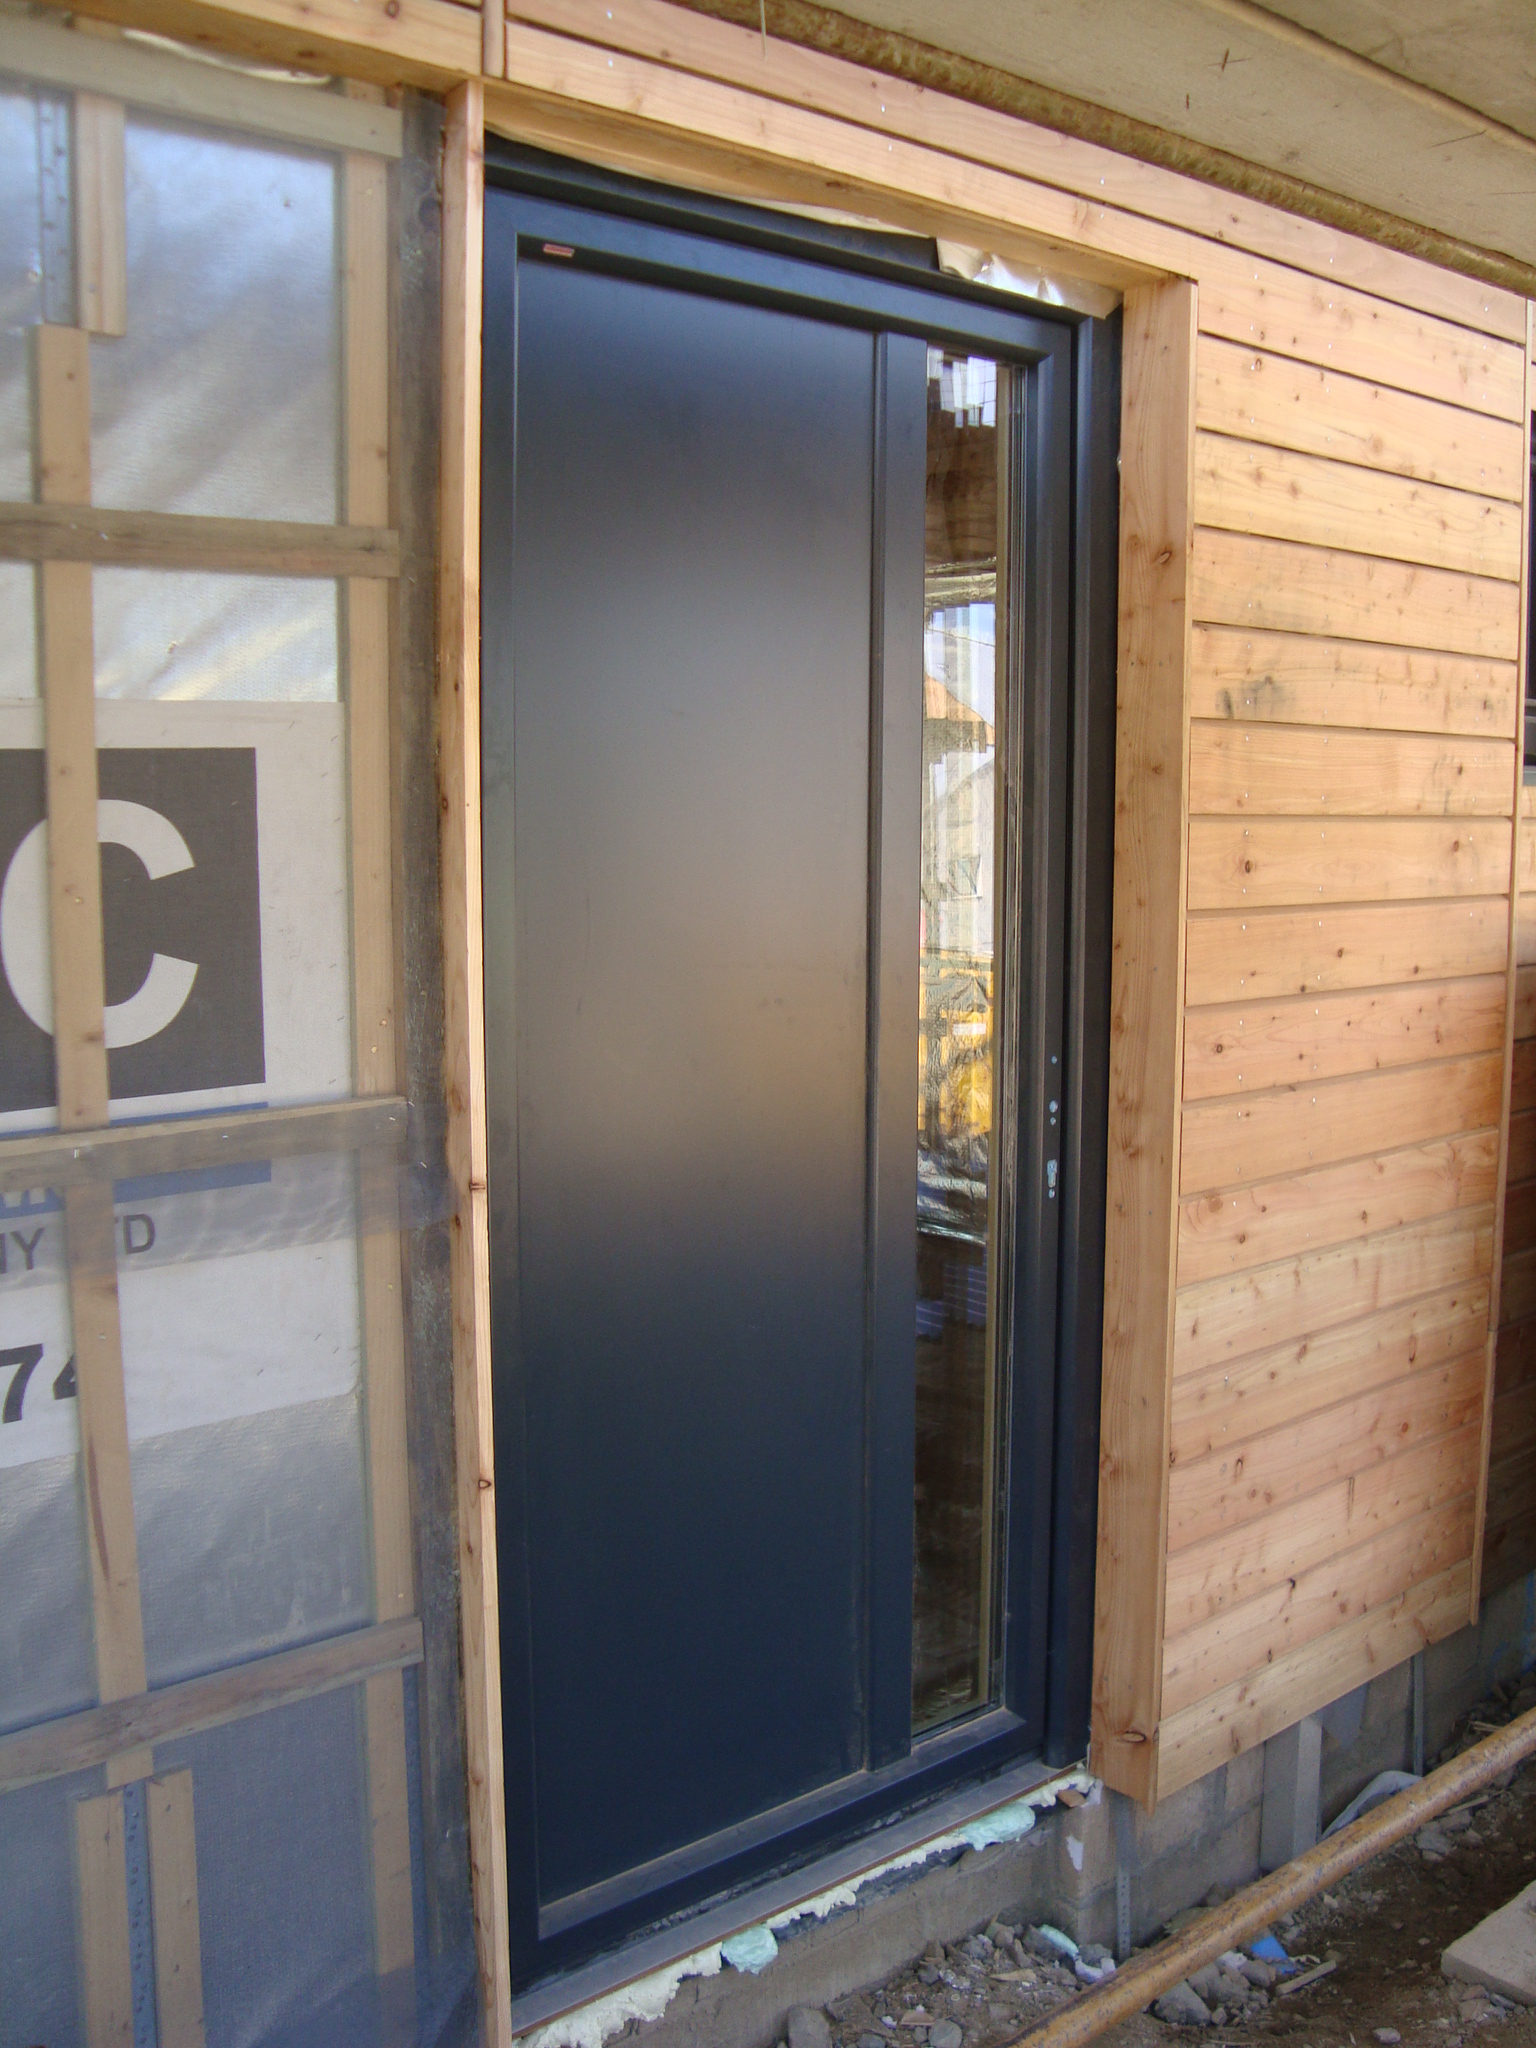
July 13th, 2010Since our last blog, the fitting of our windows and external doors has been completed and, although they took a little longer to fit than first expected, they do look fantastic and mean that our envelope is now wind and watertight.
In terms of our Passive House standard, the windows and external doors play an extremely important role in the overall envelope, maintaining a fine balance of contributing to the high performance envelope (windows and doors have U-Values of 0.8w/m2K) but also importantly allowing solar gains into the spaces which help reduce space heating demand.
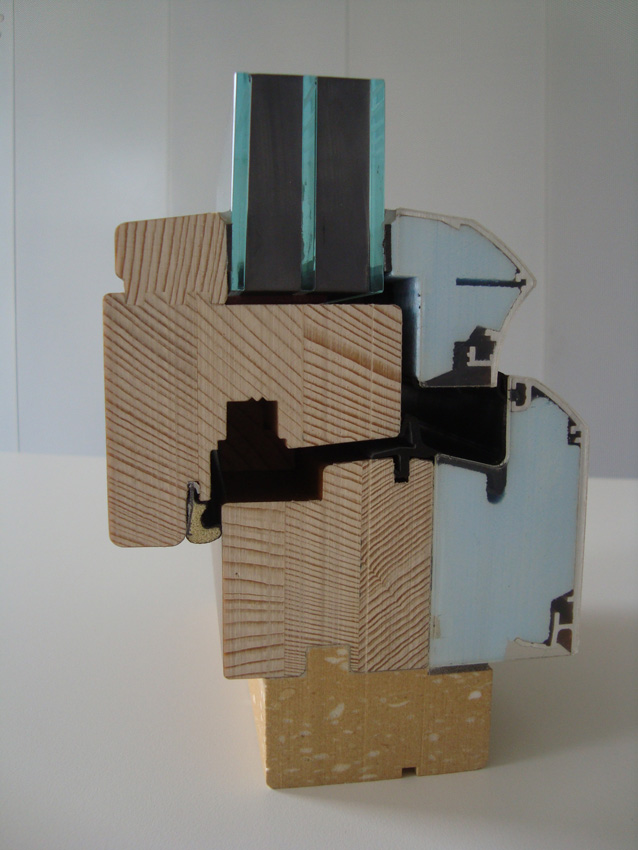
The units we chose to use are Internorm ‘Edition’ windows and doors from Austria (supplied through Dynamight Internorm in Rosyth) with the glass-to-glass corner windows made to the same specification from Bohler Fenster in Germany. They are both high performance composite timber/aluminium windows which are triple glazed (using high performance spacing bars) and are already Passive House certified by the PassivHaus Institute in Germany. The two glass-to-glass jointed corner windows allow some really good views and a nice visual connection back up to the heart of the expo site, the village green.
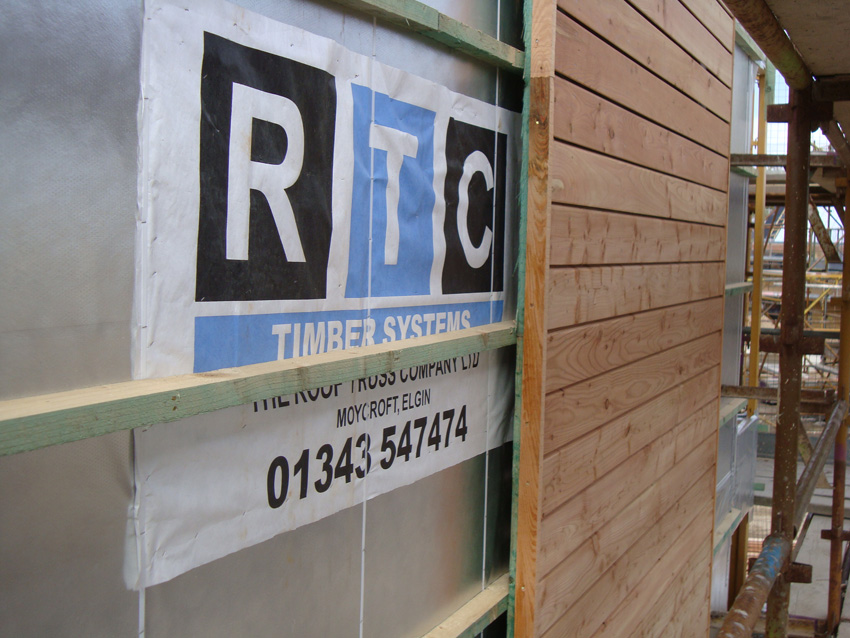
As the windows were being completed the team was able to begin a very patient and intense final check on wall, floor and window/door junctions with RTC Timber on site again for a few days. Air tightness is crucial to the effectiveness of the Passivhaus. The connections between the various components of the building, such as the floor-to-wall, wall-to-roof or window junctions, are often the areas where air leakage can occur, as movement between the different materials can lead to air loss. The air tightness of the building is also essential for the MVHR unit to run efficiently.
Alan from RTC did a fantastic job with a couple of O’Briens joiners over 3 or 4 days and I think they must have cleaned the local supplier out of EDPM and foil tape. We used a self adhesive EPDM film to seal wall panels and floors and a self adhesive foil to seal window, door and other small junctions. We also used some polyurethane foam to fill some small awkward joints around timber junctions etc. On a standard project, silicone would normally be used to seal many of these junctions, although this only works for a relatively short period of time, eventually breaking down with the expansion and contraction of materials, whereas an air tightness tape such as Illbruck will accommodate that movement. The tapes and foils we used were all carefully specified using RTC’s own experience and were chosen to last and perform over the lifetime of the building.
Internally the high performance vapour barrier was also carefully taped and sealed. This will be left intact with minimal penetrations - all services will run in a clear 20mm service gap on the inside of the frame. Any staples or nails through the membrane are deemed to also close off and seal the membrane again.
As we arrived on site, final preparations were being made for the air pressure test (or blower door test). Passive House certification requires our building to have an air permeability of 1m3/hr/m2 or less (equivalent to an air tightness of 0.6 air changes) at 50 Pascals (Building Regulations standard is currently 10m3/hr/m2). The air tightness is tested by closing all openings to the outside such as windows, doors, Mechanical Ventilation Heat Recovery (MVHR) intake and extract vents and any other outside penetrations such as waste connections and slab penetrations, and with a variable speed fan fitted to an adjustable frame in the external door opening. By controlling fan speed, the internal pressure is lowered by 50 Pascals from the external pressure which mimics a wind speed against the building of about 20mph.
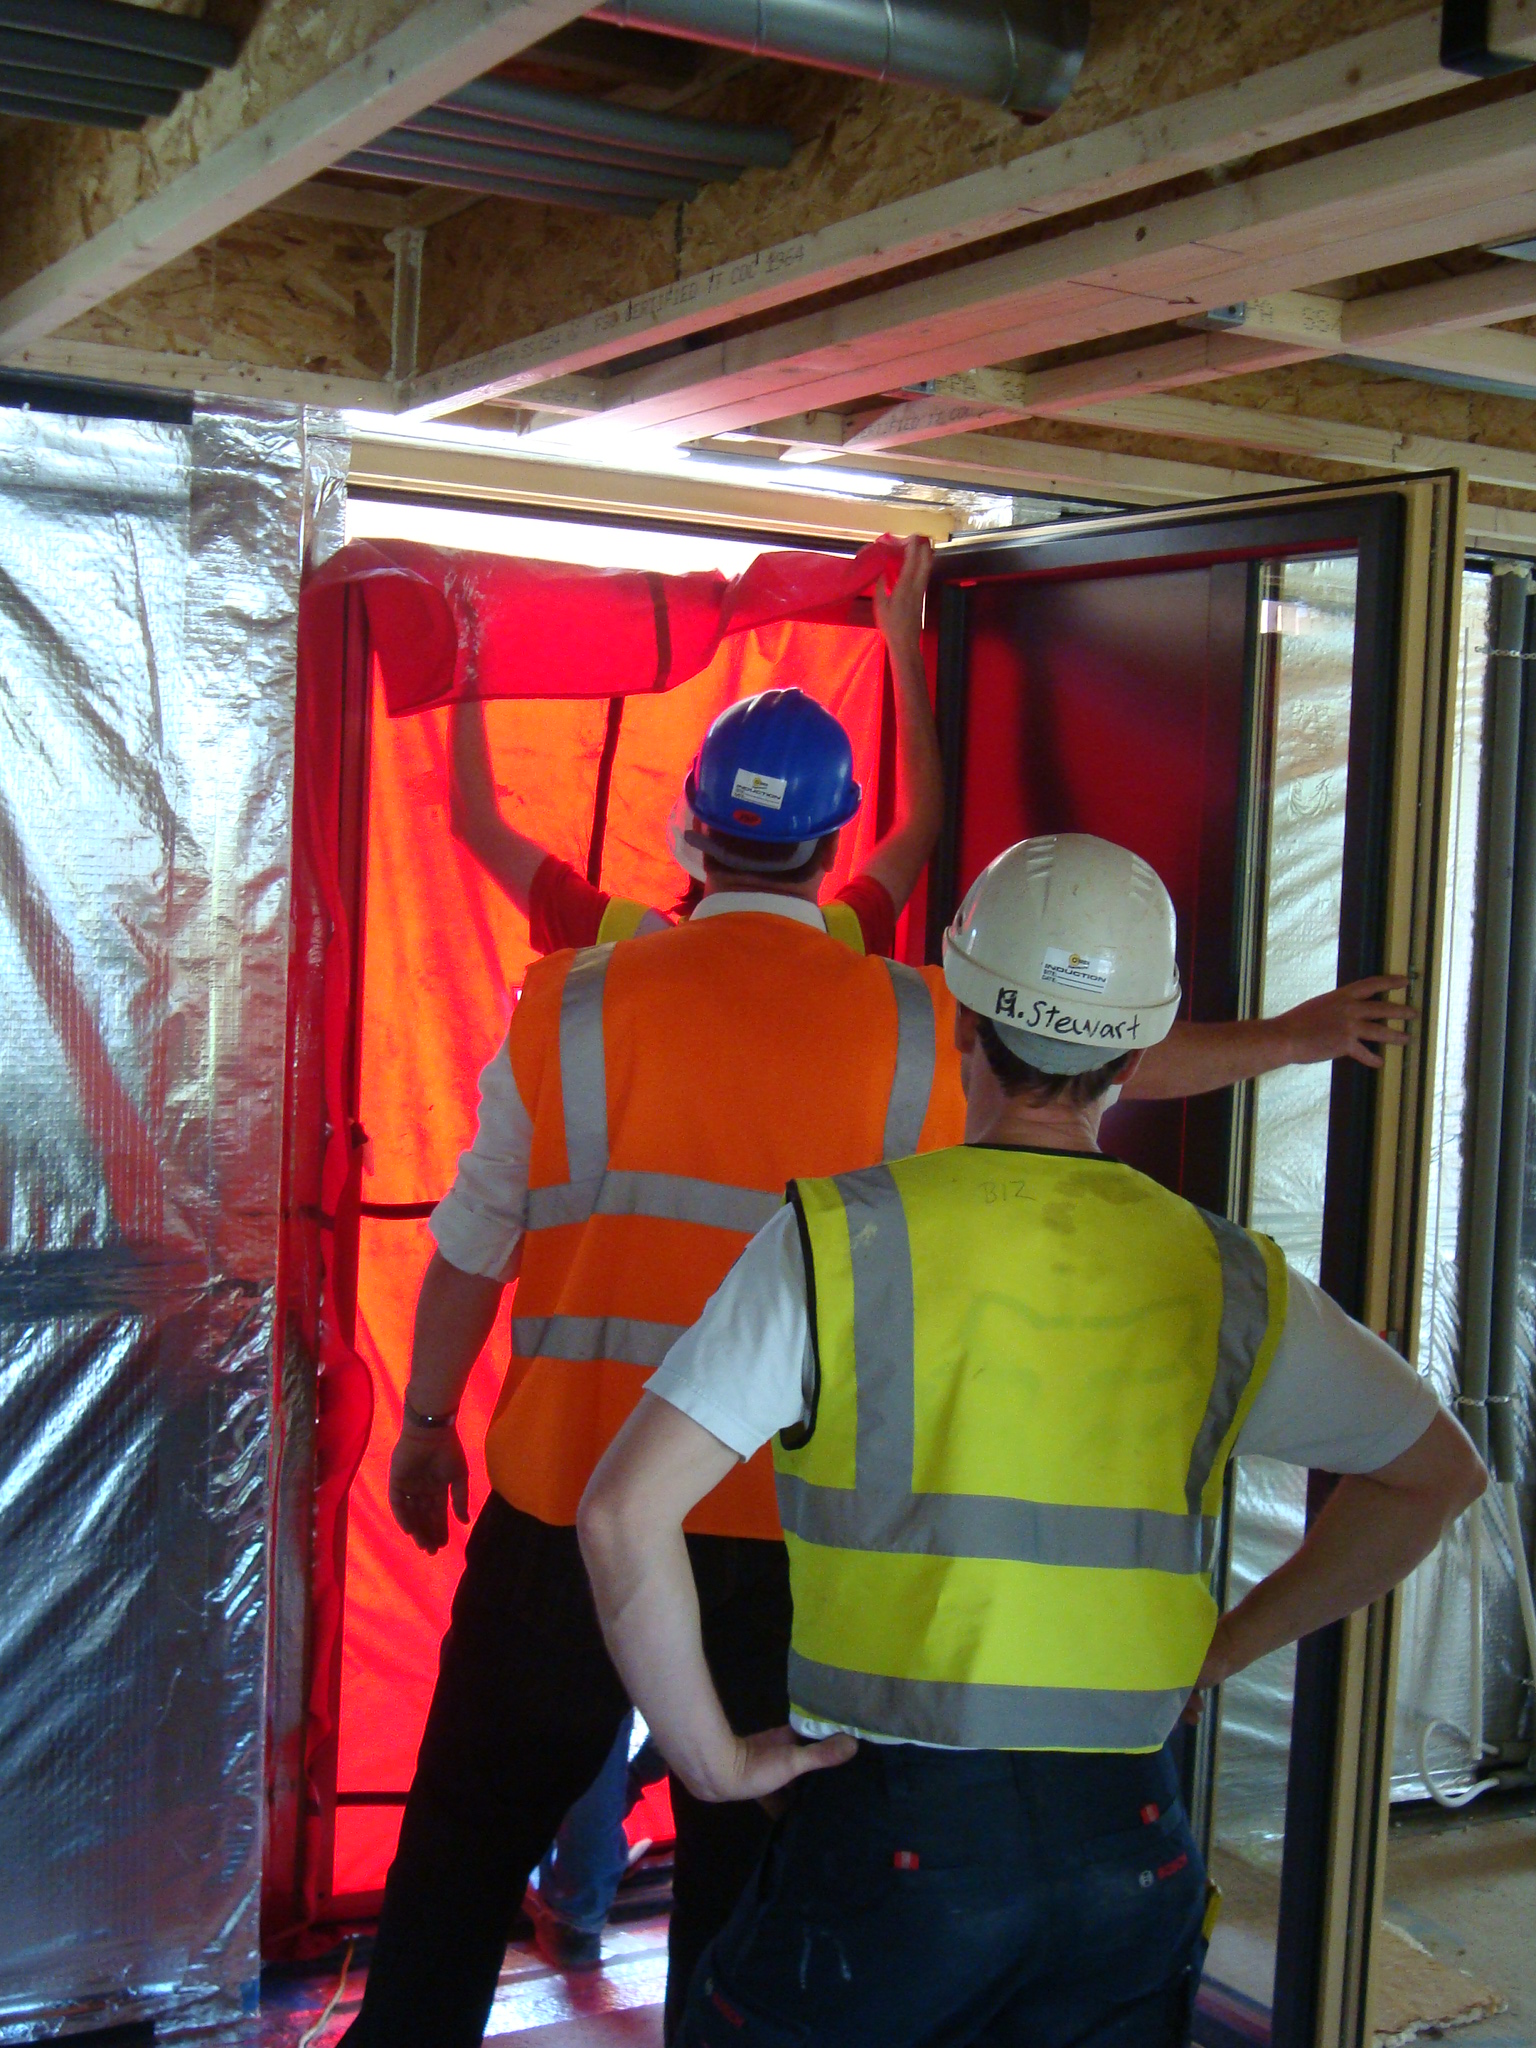
The fan is then used to pressurise and depressurise the building. The airflow rate that is required to maintain a number of particular pressure differences across the building envelope is recorded and measured – with the leakier the building, the more air flow required to maintain a given pressure differential.
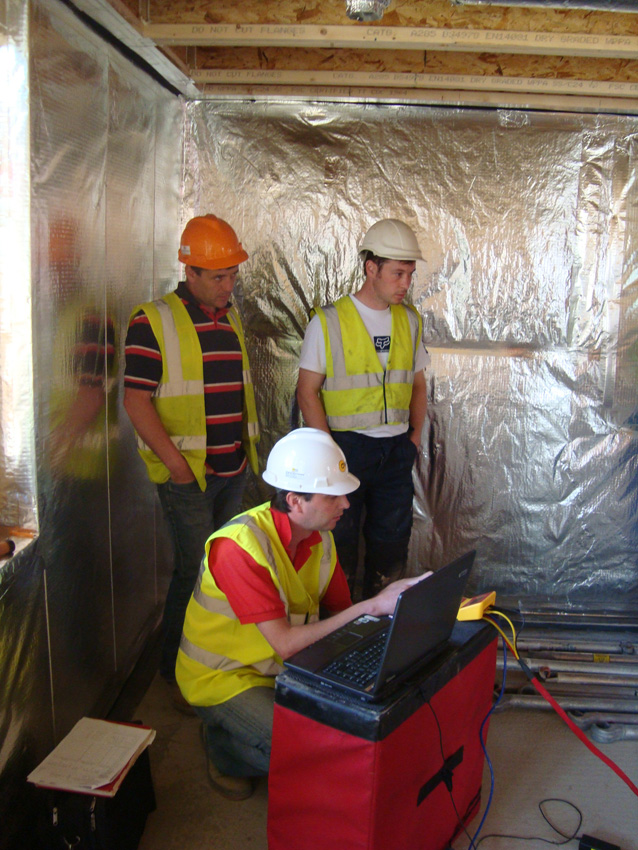
With a bit of tweaking initially with fan speeds etc we got a first reading of just over 1m3/hr/m2 meaning we weren’t far away. By carefully examining junctions around the first house we were quickly able to identify where small areas of leakage occurred and were able to use some additional tape or foam to seal these areas. We were also able to do a smoke test and by going round some small vulnerable areas we could quickly identify where there were very small air leakages some of which can be resolved later by small adjustments in door or window openings etc.
The 3 main areas where we found air leakage were:
1 - Around 2 of the window frames where it appears the seals may not have been installed as well as they could have between the window unit and the timber frame.
2 - We found some very slight leakage around the seals on the large sliding doors – maybe a lesson not to specifically use these in passive house however we hope that these can be adjusted slightly to increase air tightness.
3 - Once the house was pressurised, some of the air seal tape to the upper floor cassettes was coming loose. We corrected this by using some temporary tape but think in future we might use a spray adhesive on the OSB prior to sticking the air seal tape down.
In the end, we achieved an average result of 0.92m3/m2/m2 (on the first house) which we are all really happy with. Whilst we may have all been hoping for something a little more significant given all our hard work, this is what we need to achieve our passive House certification and in that respect we are all delighted and relieved! It took some time to set up the other units and catch some small areas of leakage but all units passed the test! Our tester believes that our units are in the top ten of air tight residential buildings in the UK.
Once plaster boarding and other second fix joinery work and finishing has been completed, we hope that this figure could be significantly bettered although we are not required to do a second test for Passive House certification.
I think it’s fair to say that this result wouldn’t have been achieved without the great working relationship we have had with timber frame supplier RTC and the main contractor O’Brien properties. Throughout the process, all of the team has understood their part in the process and have given their commitment to get the air sealing and envelope right. This was really only brought about by the early inclusion in the process of both RTC and O’Briens. In the end however it has been a learning process for us all and will be easier next time round!
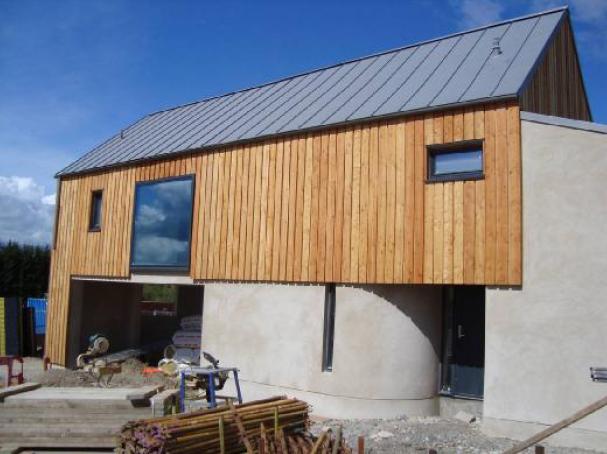
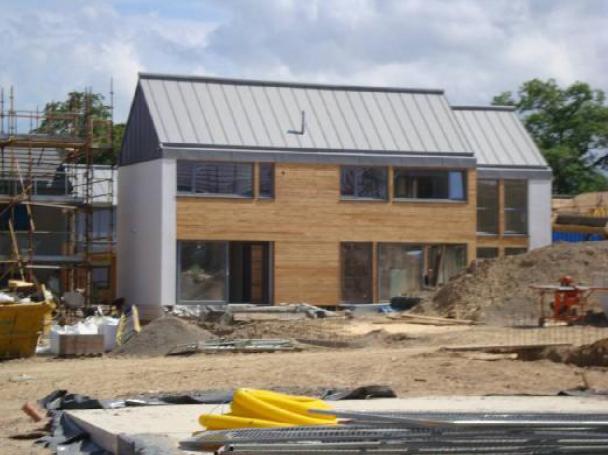
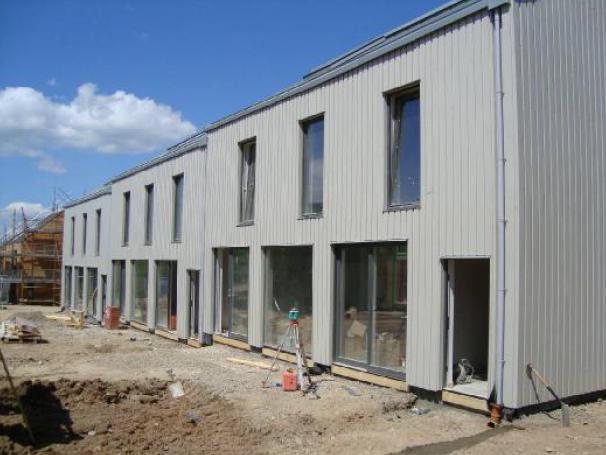
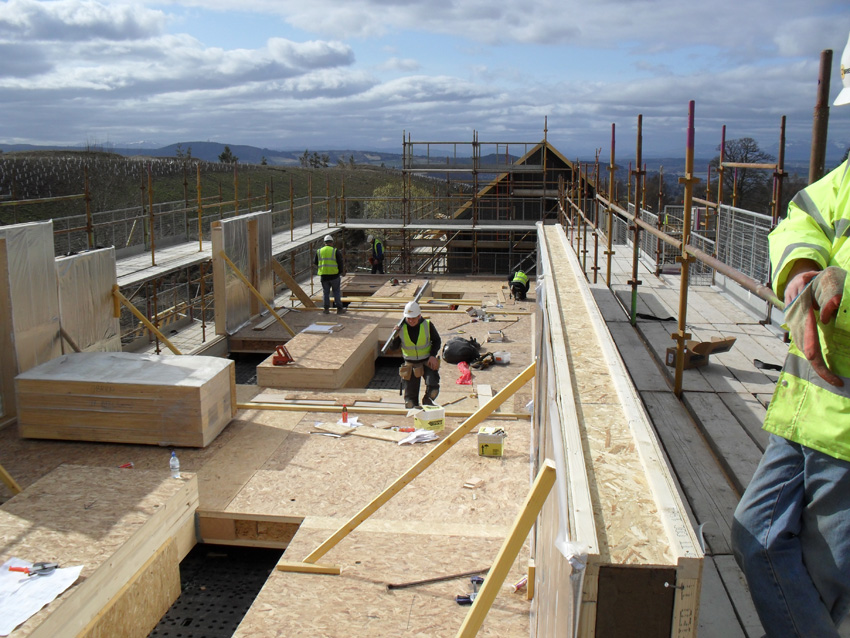
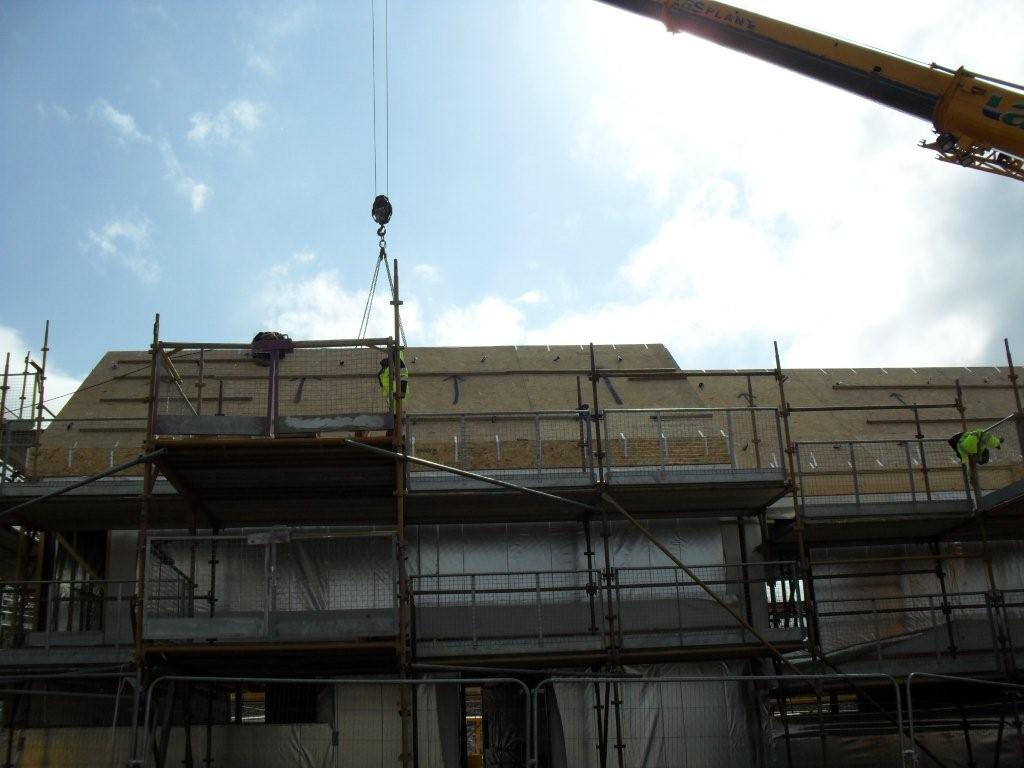
The external cladding works are just about complete with the timber and vertical profiled sheeting looking pretty sharp, although there are a few small niggling issues with the timber cladding and the way it has been set out. Roof cladding and flashings are also complete.
We met recently with Steph Marsden from Craft House Concept who we are talking to about exciting ways of furnishing one of our units for the duration of the expo. Hopefully we can showcase some great contemporary Scottish made furniture and promote some great young furniture designers.
Some other great news recently on the funding of our landscaping, with confirmation that one of our gardens will be completed in line with our original sustainable garden concept.
Cladding...
June 16th, 2010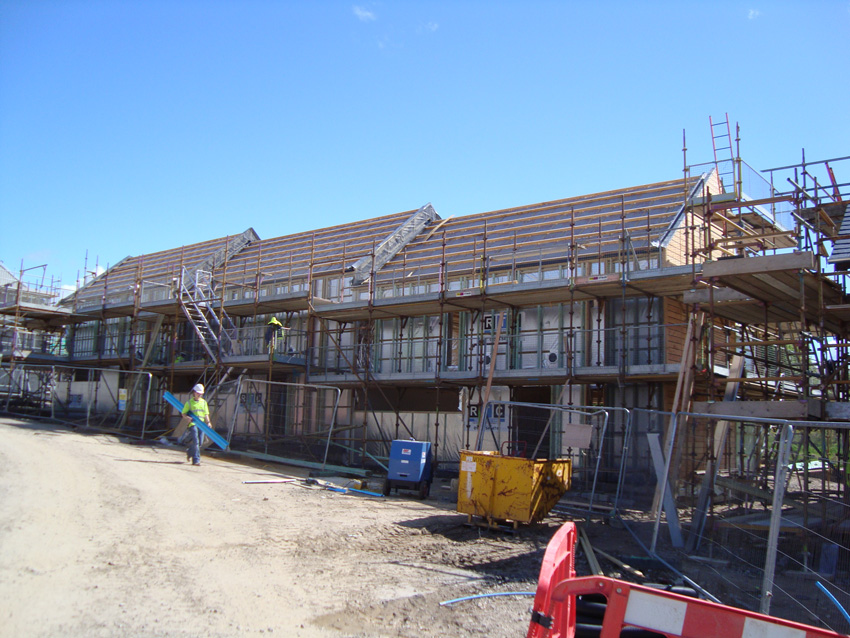
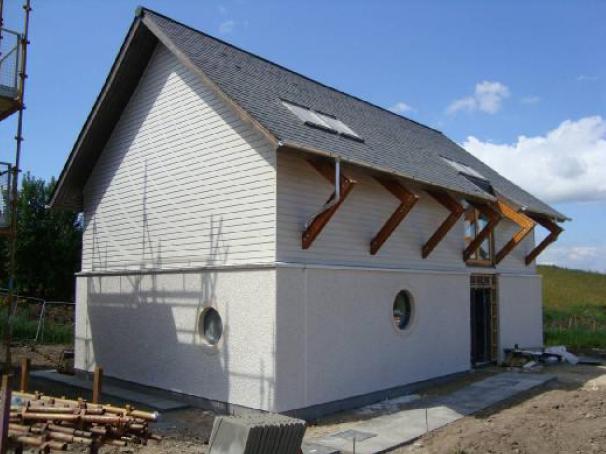
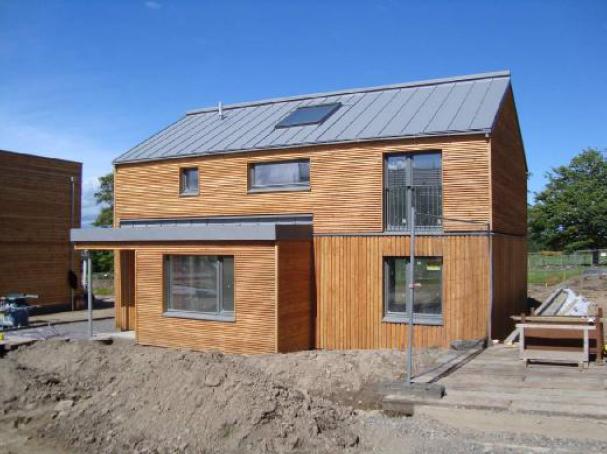
With the Timber frame essentially complete, the joinery team has begun the task of cladding the buildings. Due to the delay with the windows, we’ve had to carefully look at the sequencing of this as normally the windows would have been installed prior to any cladding works.
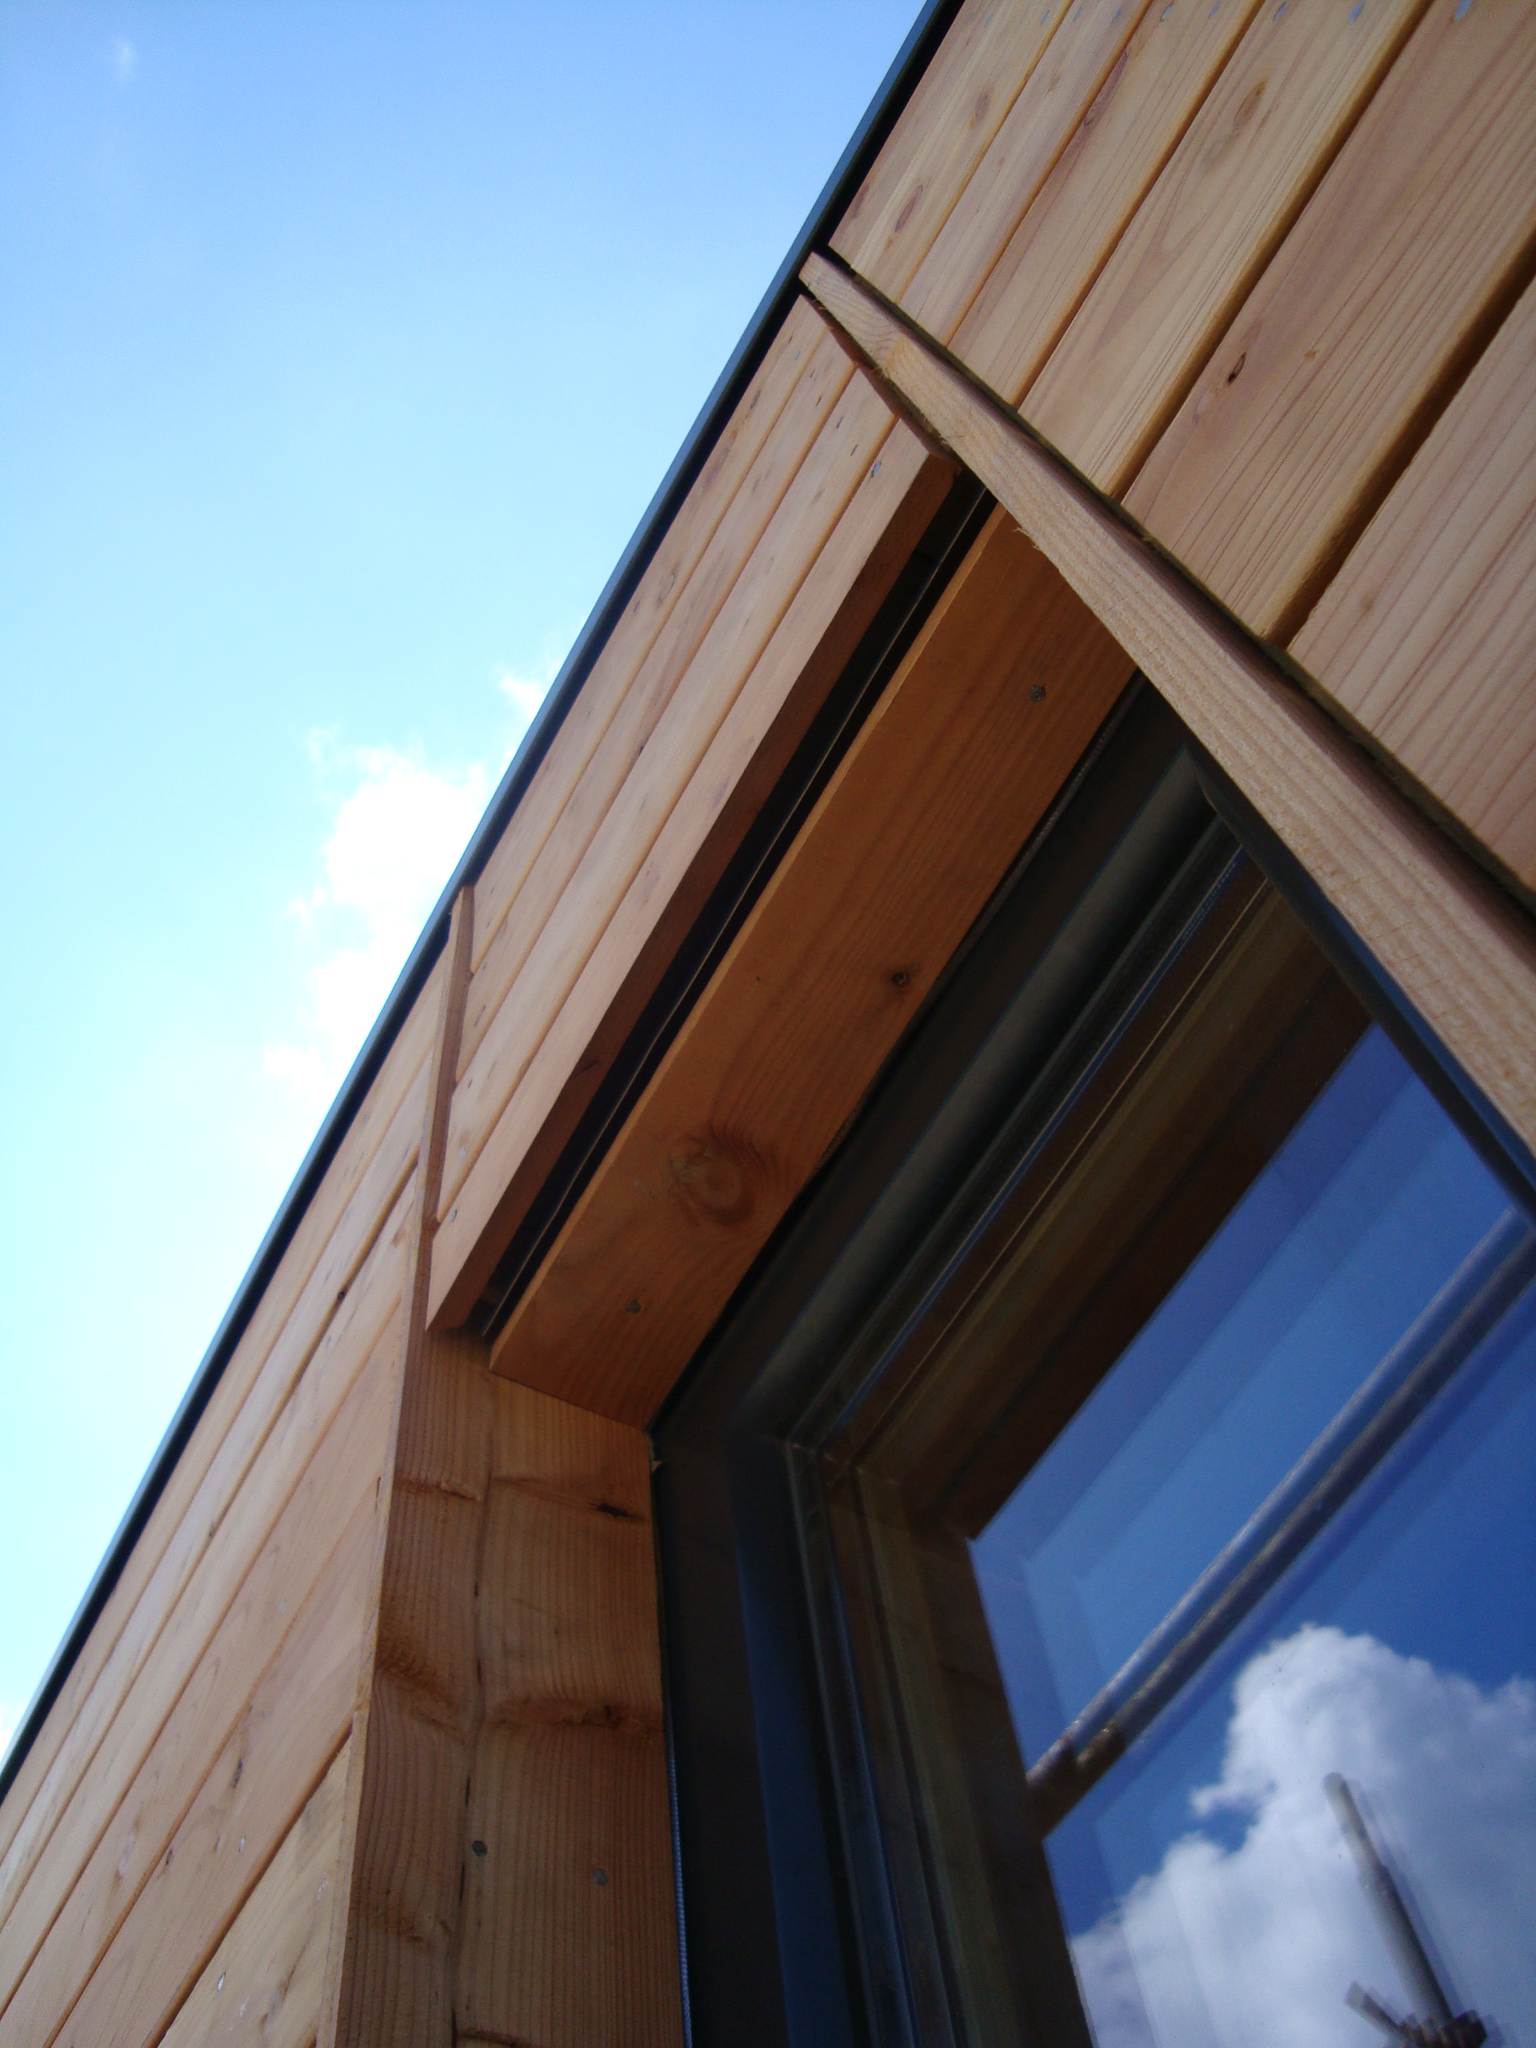
Our detail is for a build up of 50x50mm battens and 50x50mm counter battens which support a locally sourced horizontal larch boarding from Russwood in Newtonmore. Due to the open profiled nature of the boards we specified, we also had to wrap the Soft Wood framing in insect mesh to prevent insect ingress. The boards will eventually conceal an external rain water downpipe as well as the extract and intake vents for the MVHR system. We have broken up the horizontal boards into panels which are defined by the vertical larch boards at the jambs of the window and door openings.

Scot Larch Cladding On site
The detailing of the timber cladding took some time to resolve, including numerous discussions with Highland Council to agree on the form of cavity barriers. Building Control unfortunately wouldn’t accept our initial proposals for an intumescent or flexible type barrier, which would have assisted with the drainage, ventilation and drying of the cladding boards, and instead stipulated that all cavity barriers were to be of a solid type.
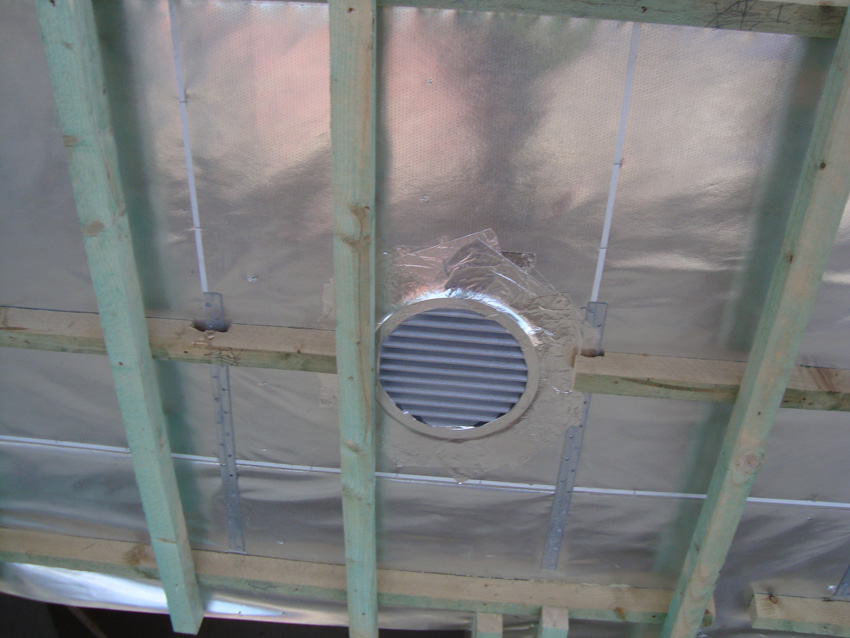
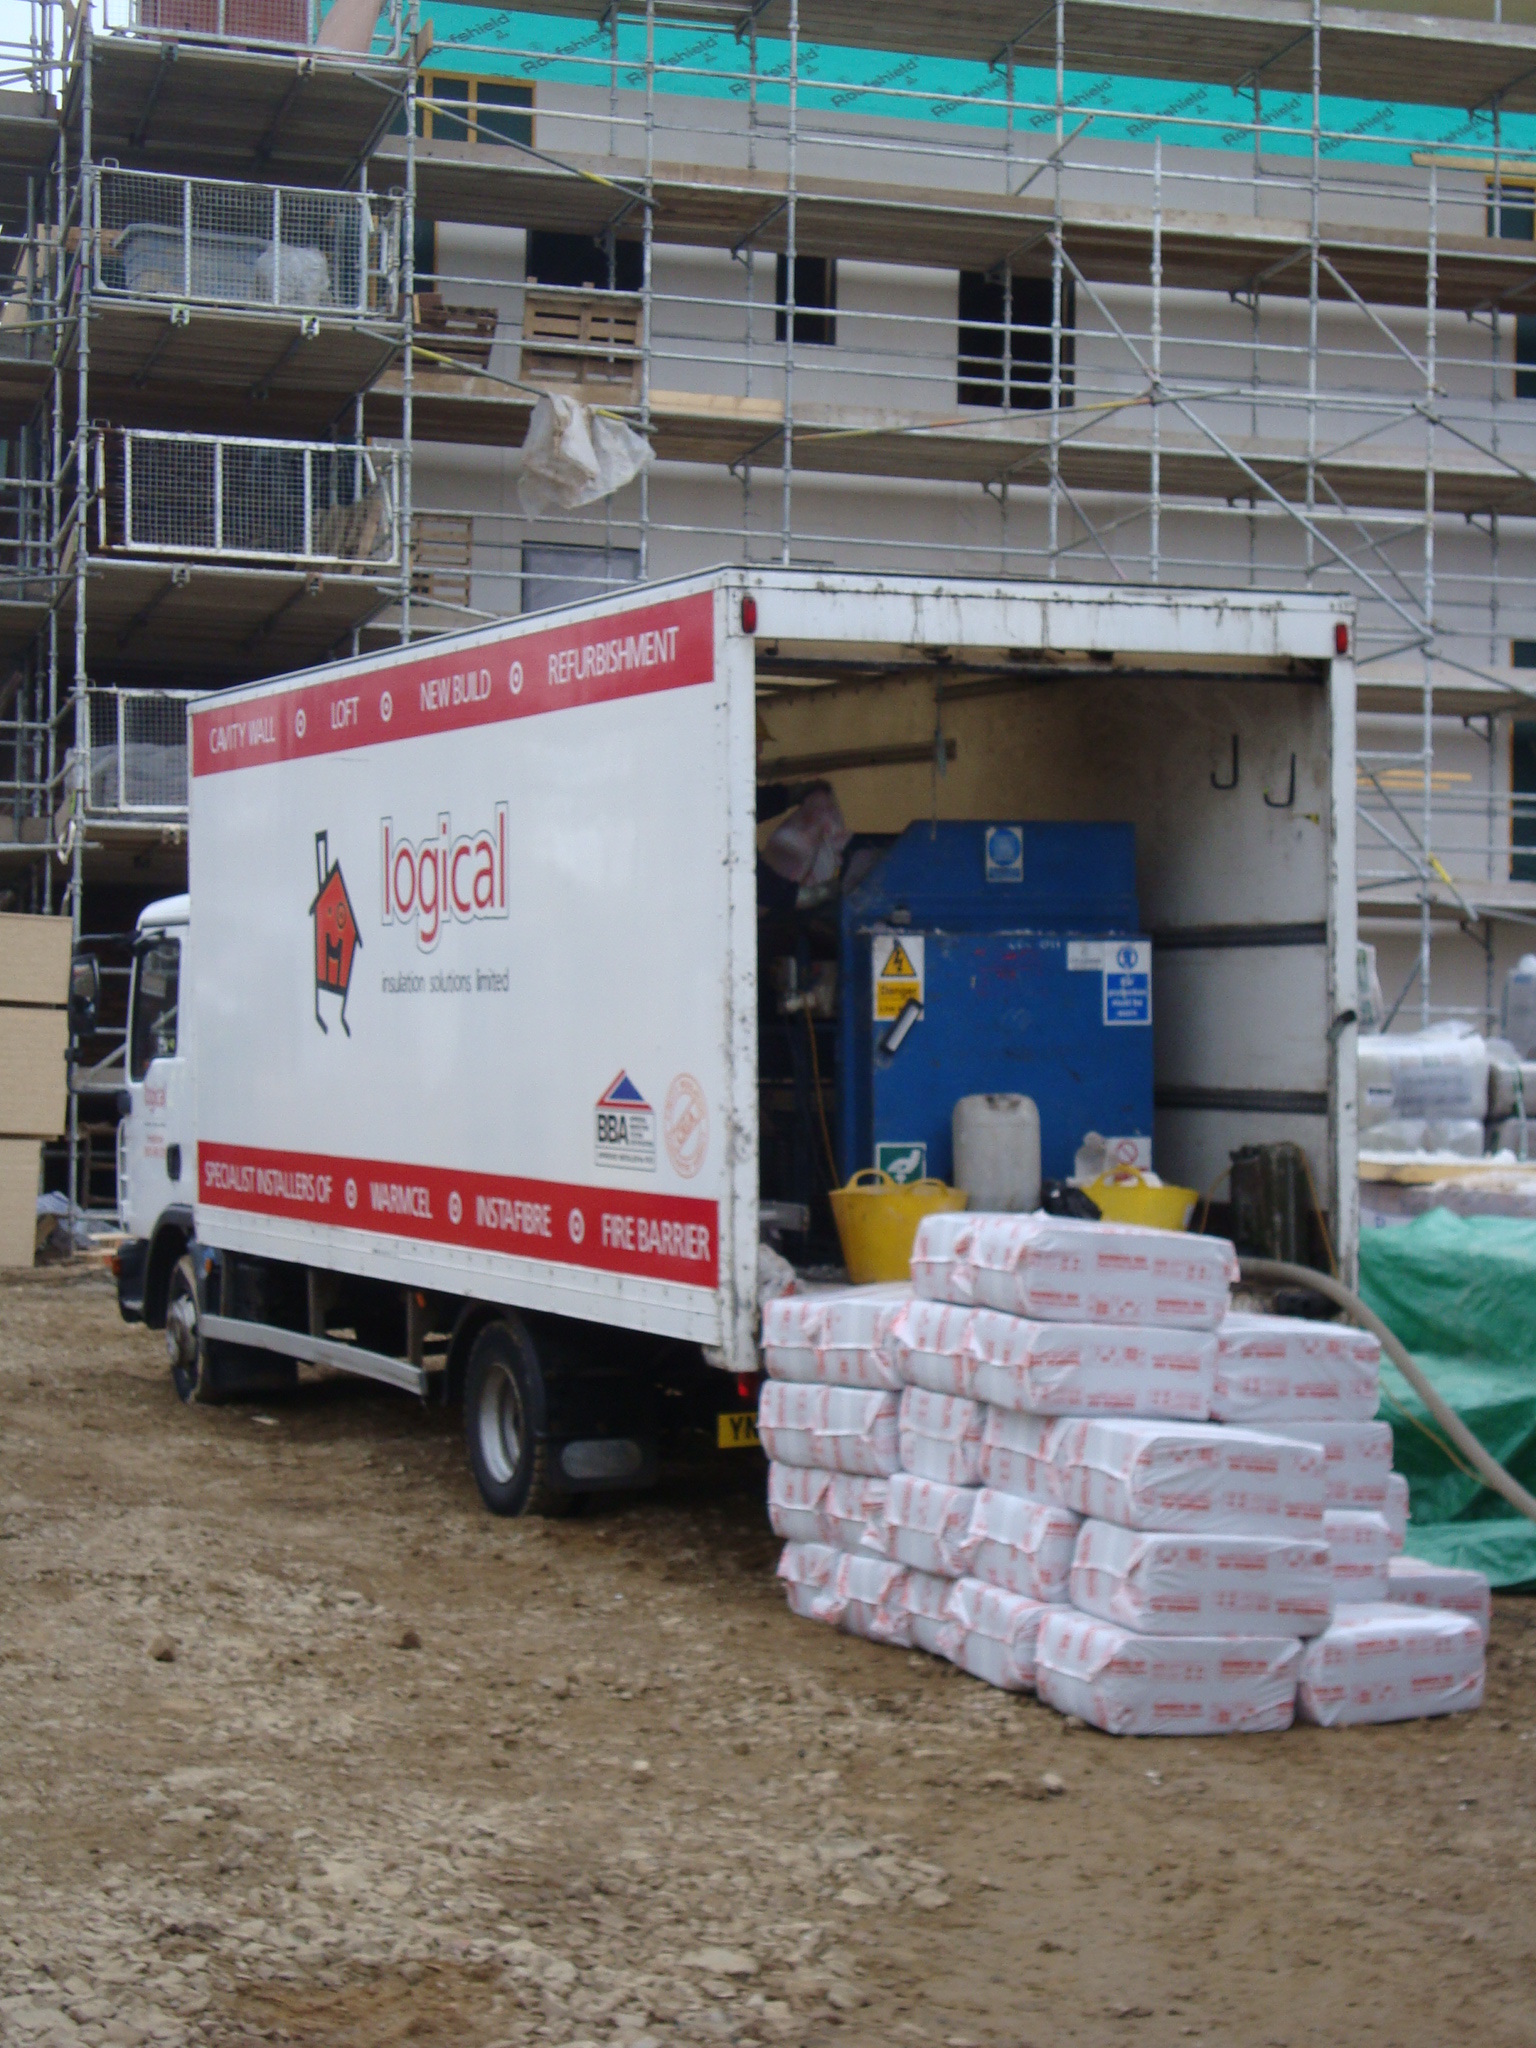
Dynamight has also been on site to install the first fix of the MVHR ducting layout. We had to coordinate this layout with the structural engineers and timber frame manufacturer to ensure that the holes for the ducting were cored in the correct places within the I-joists and glulam beams. Dynamight has done a neat job and with this in place the first fix electrical and plumbing elements can proceed. The intake and extract vents have also been fitted to the external walls but will require some additional insulation to be replaced around these and fully taped internally to ensure a tight air seal. We also need to fully seal the ducts off prior to the initial air pressure test. When the final test is done however the balanced vent system will be fully operational and connected to the MVHR unit.
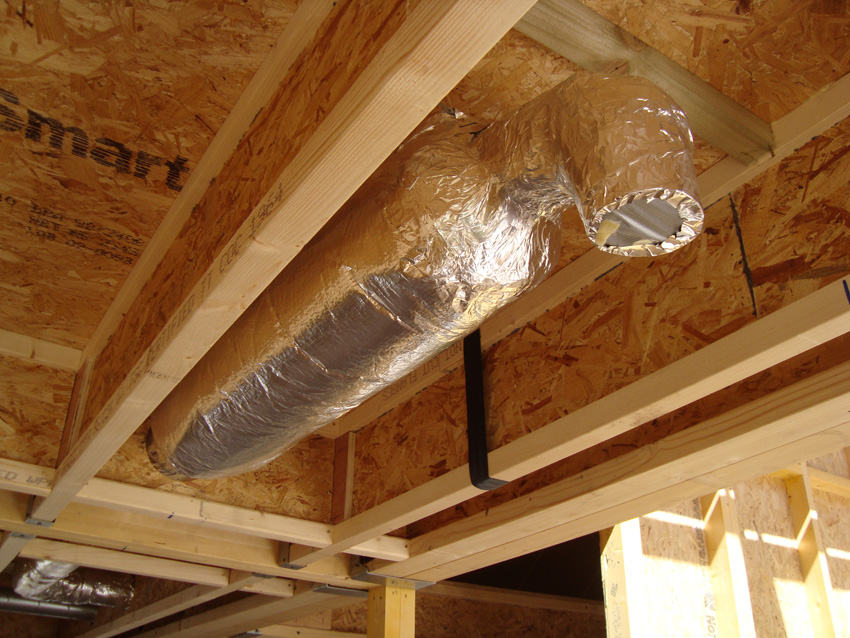
First Fix MVHR Ducts In-Situ
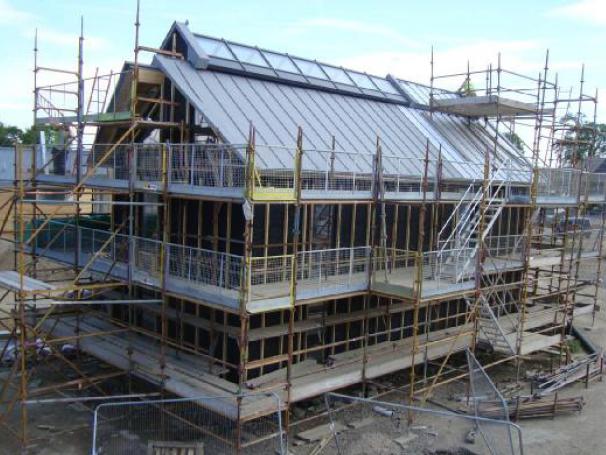
All the lead work has been completed on the roof and the bespoke, pressed aluminium gutters are now in place awaiting the fixing of the Marley profiled roof sheeting. Despite wanting to achieve a concealed gutter, we took the decision to keep the gutters and their outlets outwith the airtight envelope – ensuring that if there are any problems in future with leakage/ failure that it will occur outwith the envelope.
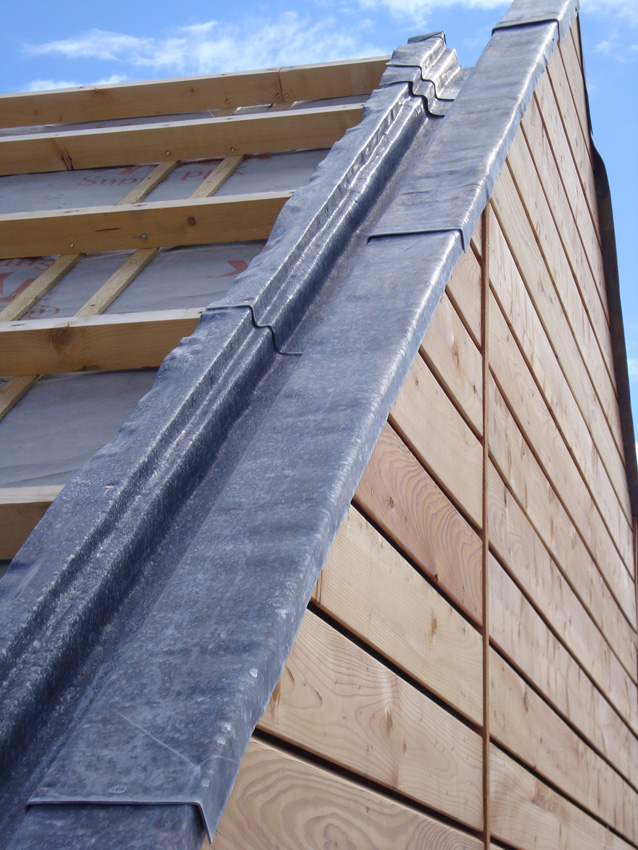
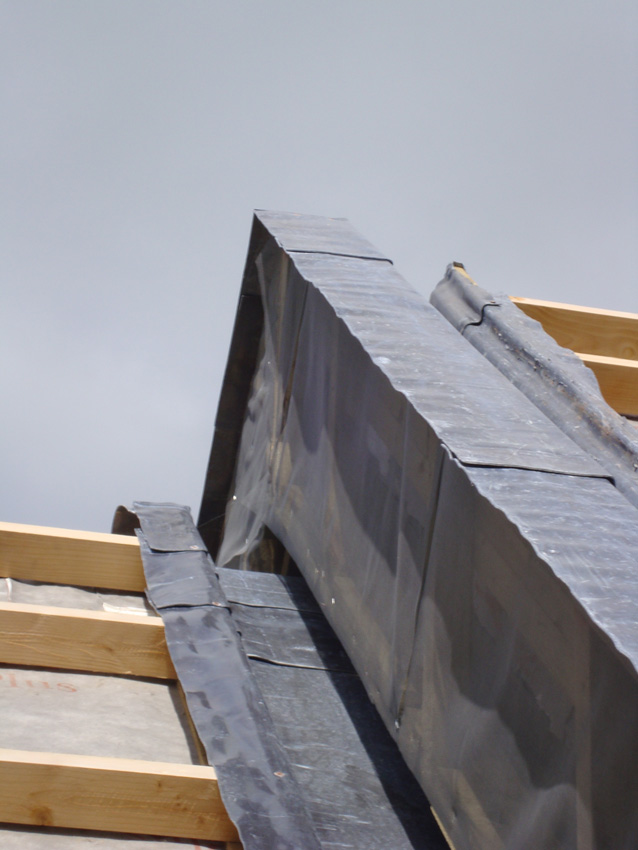
Timber Cladding and Lead Work to Gable/ Stepped Gables
Despite some minor problems with the painting of our roof sheets at the Marley Factory, it looks like our roof sheeting is still due to be delivered in the next week. Panic ensued when we realised that the factory was about to shut for a week, but thankfully they did enough to get our sheets through the painting line before the shut down!
We originally wanted to use a recycled aluminium profiled sheet on the roof but struggled with sourcing something of the right appearance and quality. We instead turned to Marley’s profiled fibre cement roof sheeting as we felt it still fitted with the rural aesthetic we were trying to achieve. We have since seen it used on some interesting small scale housing projects in the highlands and islands.
Whilst work progresses on site, we are also continuing to push to find some sponsorship in order to realise one of our gardens which will be planted with local species to enhance wildlife habitats and encourage biodiversity, whilst allotting space for food production and composting. The Highland Housing Alliance has appointed Gerardine and Wayne Hemmingway to design a number of other gardens across the expo scheme, however our ‘sustainable’ garden was part of our competition scheme and with our in-house Landscape Architects, we hope it will become a showcase for sustainable landscape design delivered in conjunction with local suppliers and assistance from the Highland Housing Alliance.

Our Competition Design for the Landscape
We now have a definitive date for delivery of the external windows and doors from Austria and have a team of both local and more experienced German fitters lined up to start fitting as soon as possible.
As soon as the windows and doors are completed (which we think will take about a week), the team will do a final walk around to inspect every window, wall and floor junction to ensure that everything has been sealed as detailed (and maybe even sealed a bit more)! We then expect the first air test to be carried out – so fingers crossed!
Timber Frame...Complete!
May 18th, 2010It seems winter in Inverness might just be over and work on our Passive House is gathering pace.
The Spring snow did eventually clear and allow our groundworks team to complete the last of the substructure works. With the underground drainage now in place and a local Building Control inspection complete, the 200mm of under slab insulation was laid and the stepped concrete slabs poured.
In line with our wall and roof constructions, we made sure that our ground floor build up achieved a U-Value of 0.1W/m2K and chose to specify that the 150mm ground bearing concrete slab had a power floated finish. A good smooth finish to the slab edge is key to allow us a good adhesion for our perimeter air seal tape, which will eventually give an air tight joint between our timber frame and ground floor slab. The weather of course still managed to hamper the laying of the slab and the contractor didn’t have the full opportunity to give the slab the finish so we will now need to put a thin layer of screed on top to get the smooth finish needed.
We also put in place a small run of duct from the rear garden of each unit which will eventually carry an insulated pipe from a small Air Source Heat Pump (ASHP). This will help deal with our domestic hot water (DHW) demand within the stringent energy parameters of the Passive House approach. The ASHP will also supply a small heating back up in the form of a wet heated towel rail system in the bathrooms although from our calculations and simulations it is unlikely this will be required to meet any of the primary heating demand. With the number of slab penetrations, we are constantly mindful that each of the penetrations need to be carefully sealed to maintain the high levels of air tightness we are aiming for.
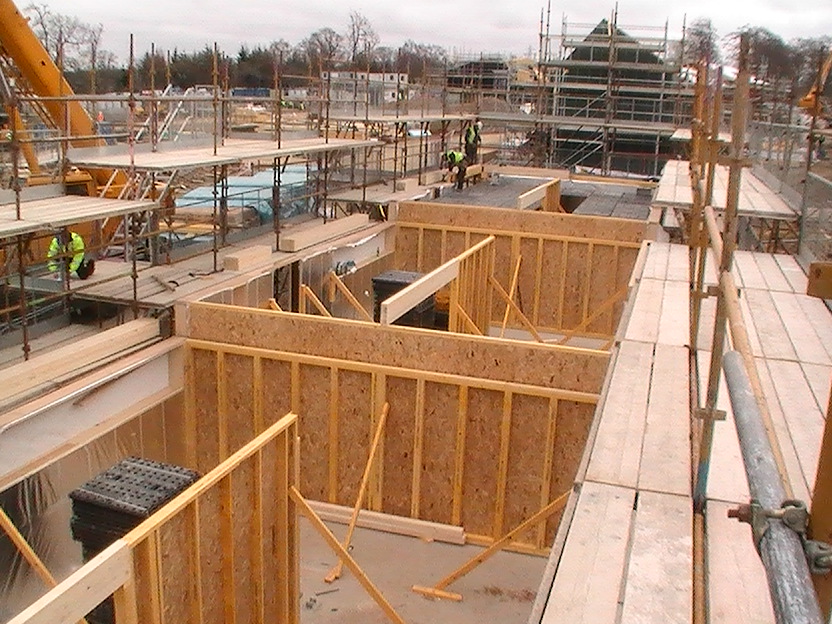
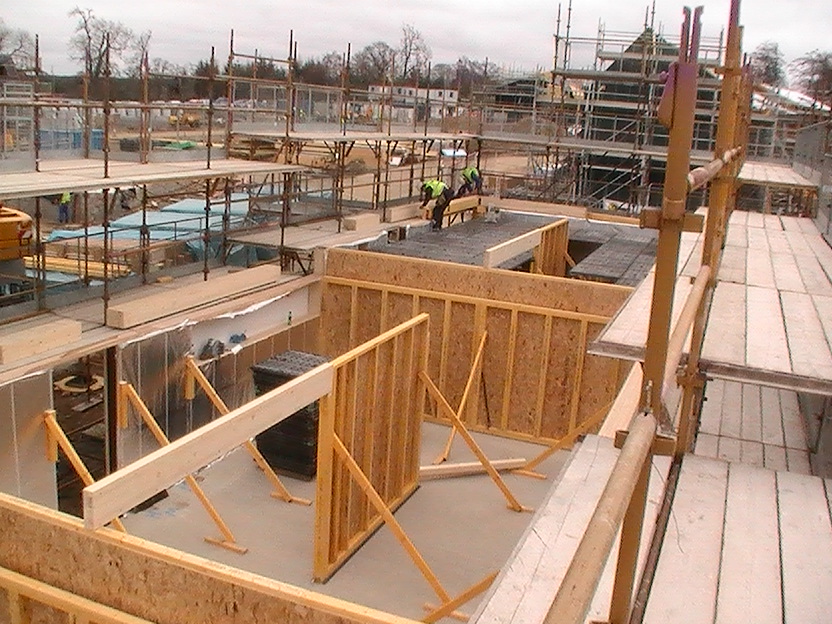
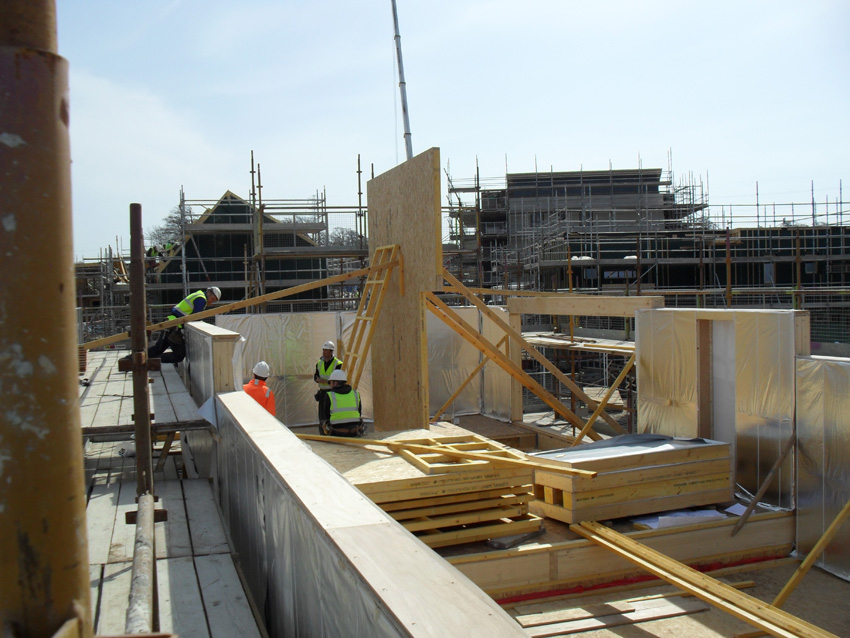
After a short period of the slab curing, the passive wall plates were fixed in place over the Damp Proof Course on top of our aerated concrete block. The O’Brien’s team began to erect the timber panels from the top of the site downwards, with the ground floor panels of each unit lifted into place first followed by the Glulam beam elements, the load bearing spine wall and the 300mm deep first floor cassettes.
Ground Floor Panels in Place
The first floor cassettes were orientated to allow for the main 100/125mm diameter duct runs within the floor build ups. They were a key element of the build and were potentially the most time consuming in the timber frame programme. Our Timber Frame Supplier RTC suggested that these may have been the trickiest floor cassettes they have designed and manufactured in the passive wall system but the ease with which they slotted together was a testament to the design team collaboration and the minimal tolerances that RTC manufactured to.
I recall an early design team meeting at Internorm in Dalgety Bay where we asked Alastair at RTC just what tolerances we should be designing to for the timber frame elements. It was met with the response….”we don’t like tolerances…we like to get it spot on!”
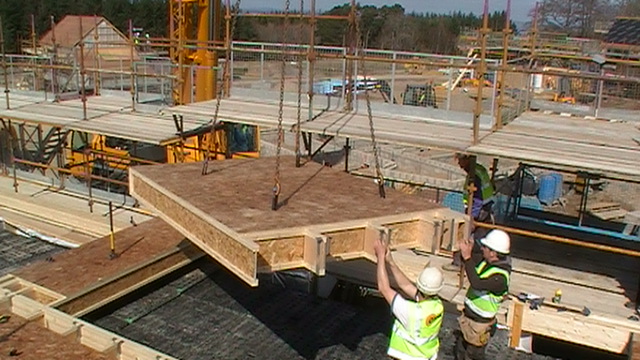
First Floor Cassettes being craned in
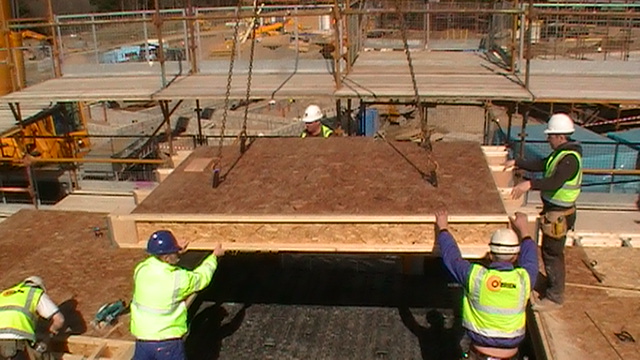
First Floor Cassettes being dropped into place
First Floor Wall Panels in place
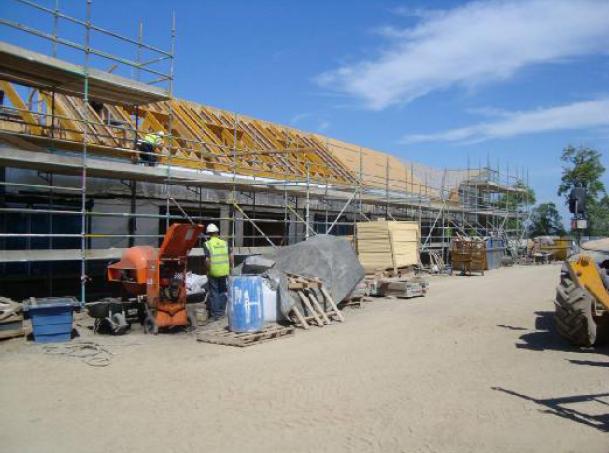
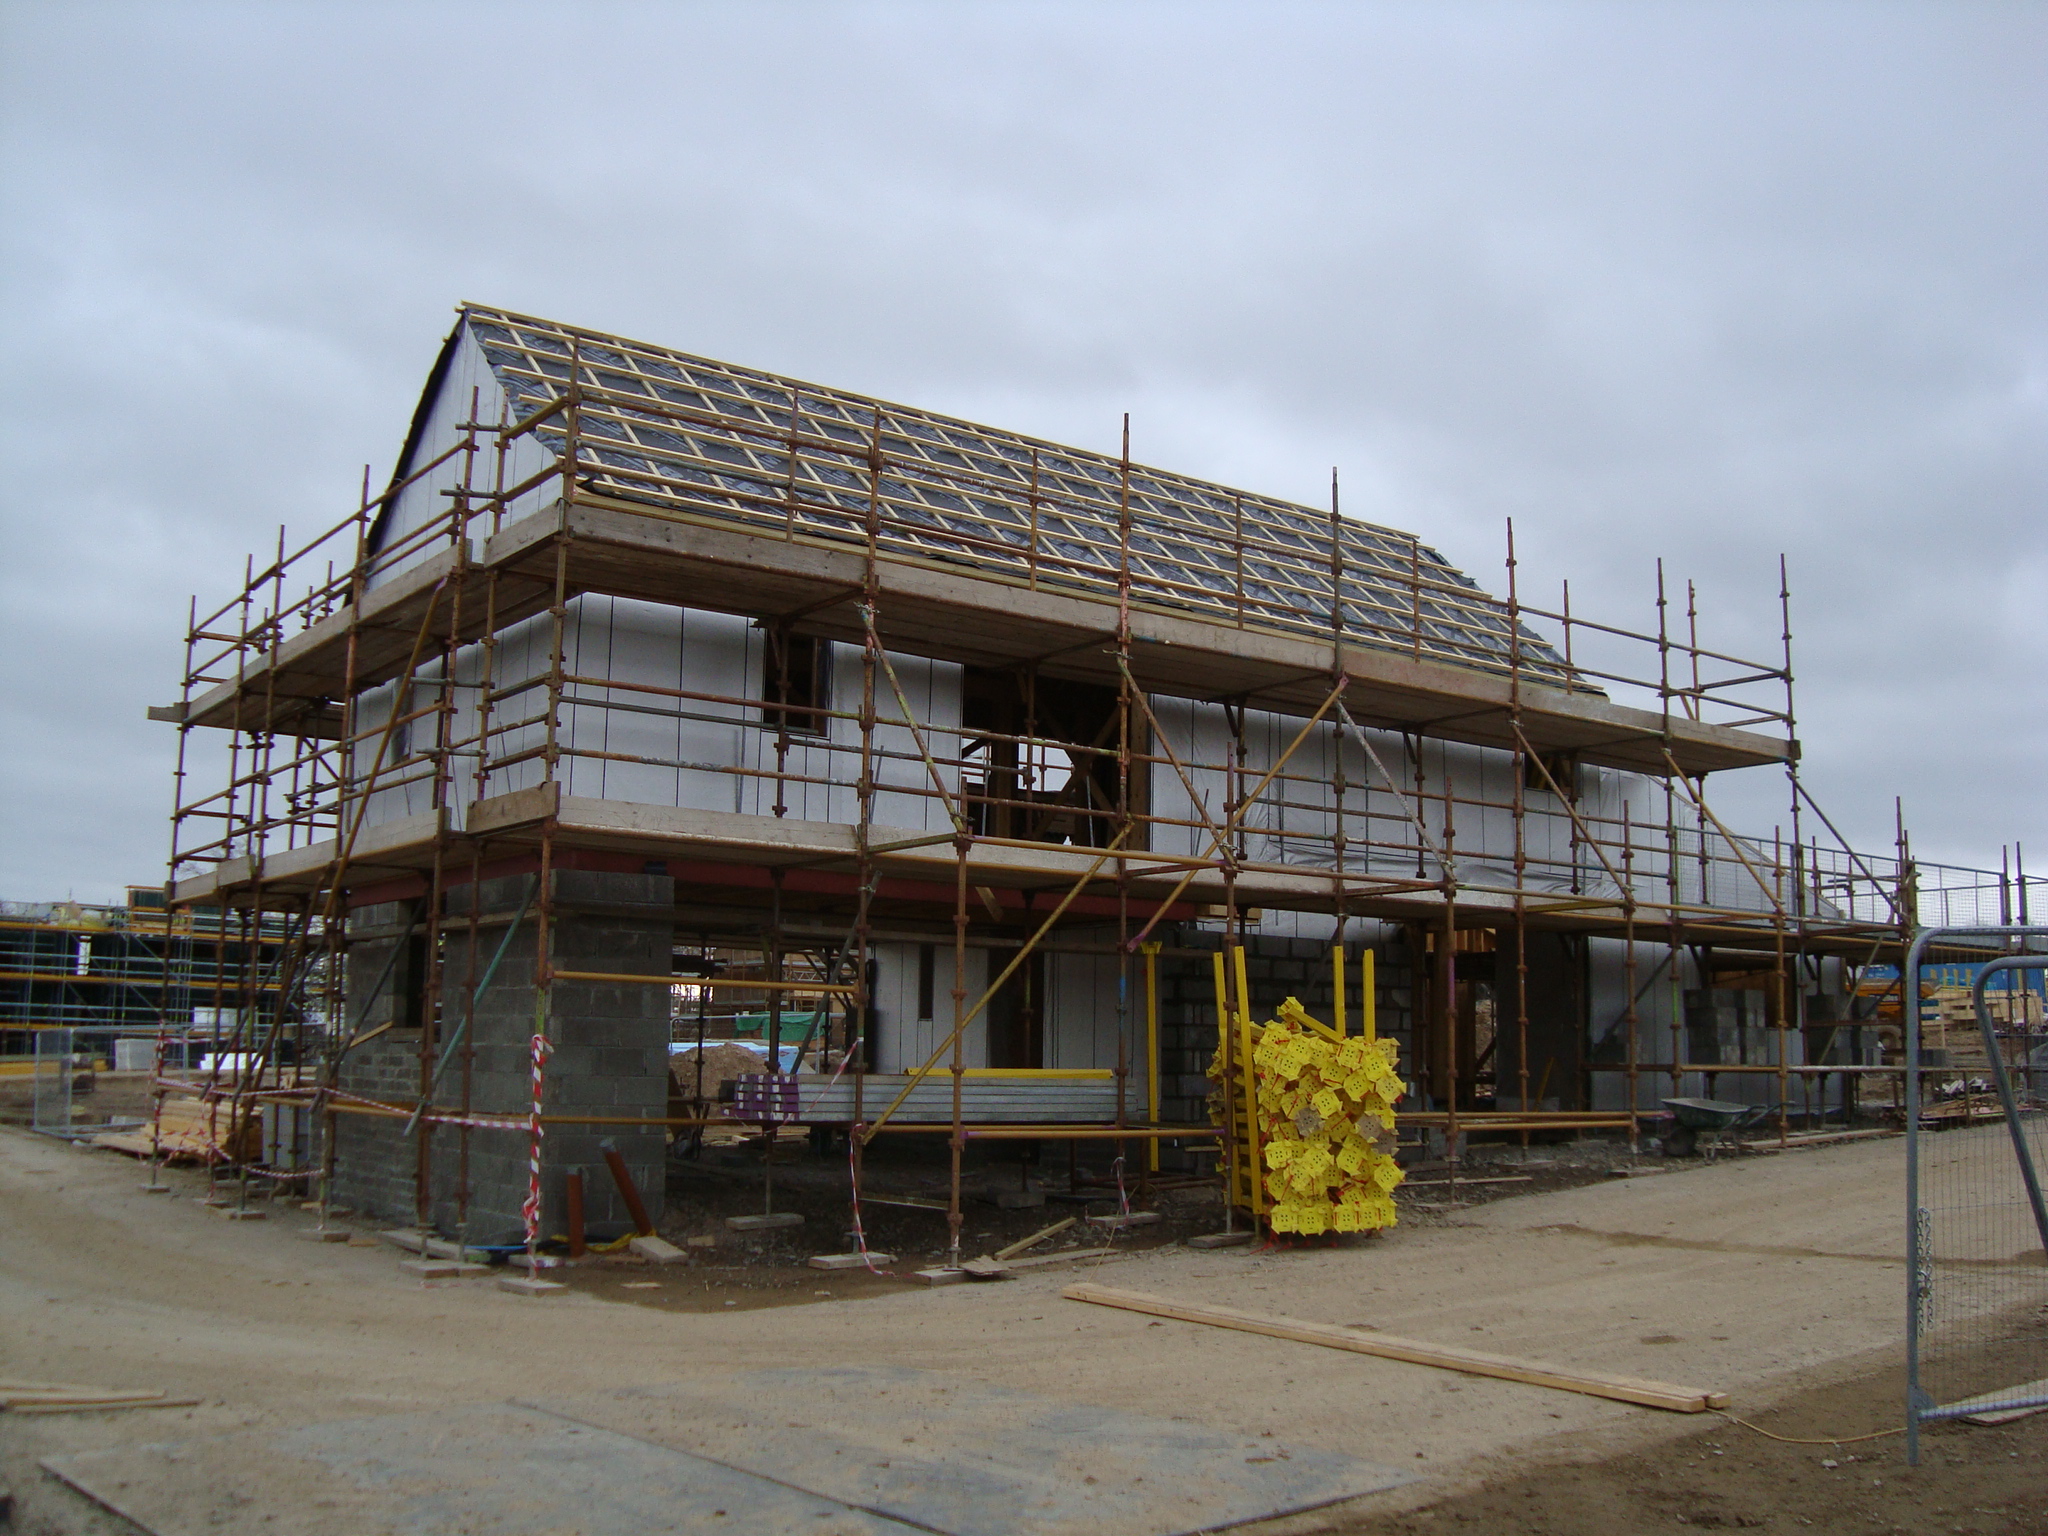
The first floor wall panels were then erected on top of the first floor cassettes, followed by the loft floor Glulam beams and loft floor panels which were similar in design and layout to the first floor panels. The roof panels were the last of the timber frame delivery but slotted in fairly well and fairly quickly, with the whole timber frame erection sequence for the three units taking only nine days.
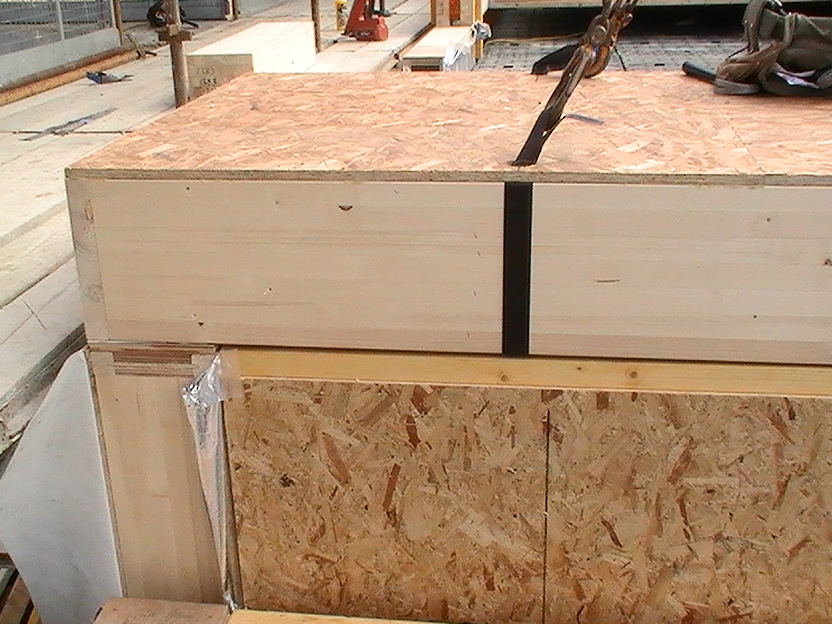
Interlocking Detail Between Wall and Floor Cassette
Load Bearing Spine Wall in Place
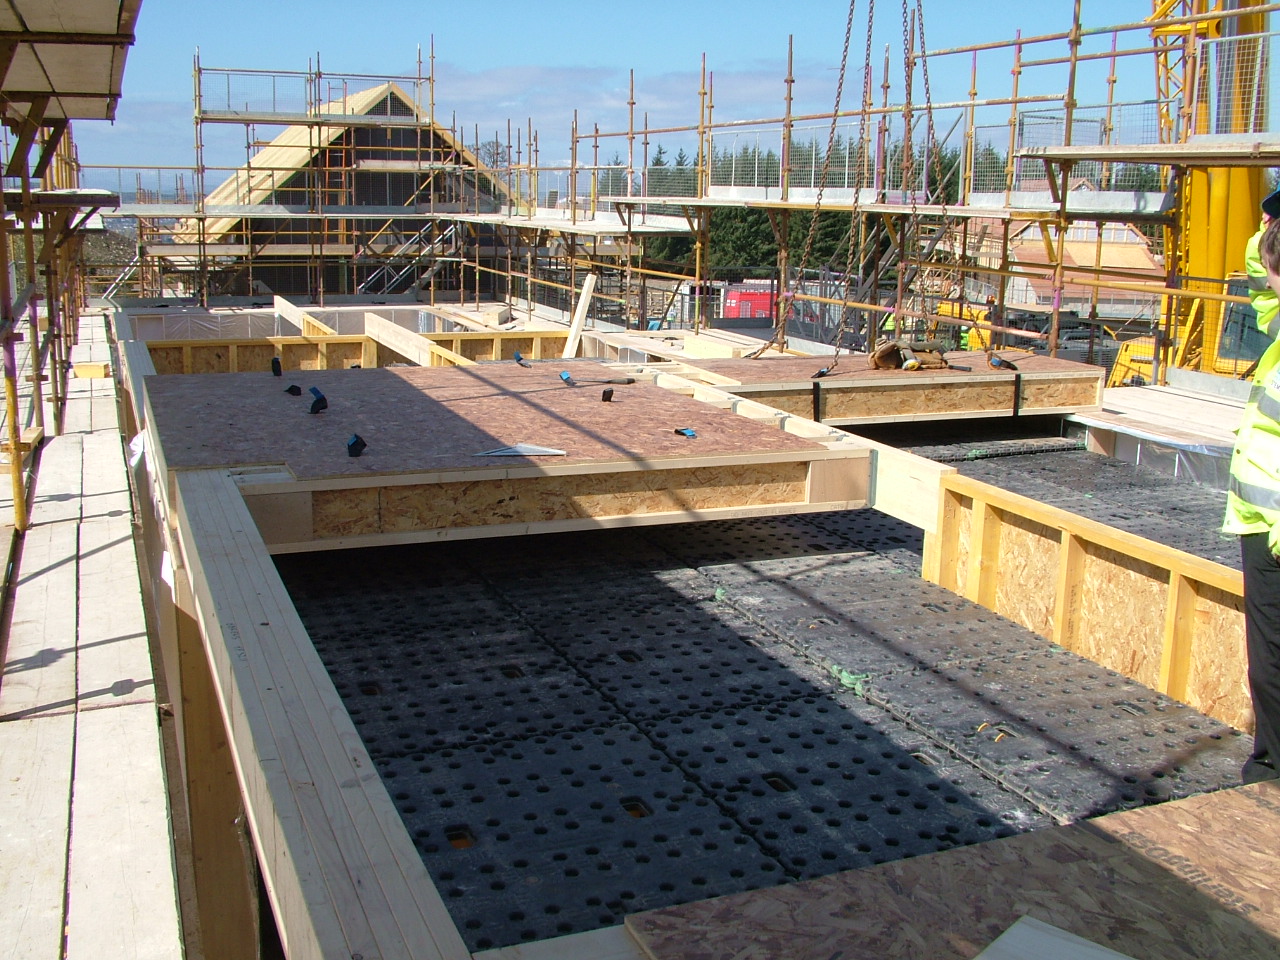
Loft Floor Cassette Panels in Place
The Final Roof Cassettes Being Craned in
Next in place were our Fakro triple glazed rooflights which achieve a u-value of 0.9W/m2K and were the best thermally performing rooflights we could get our hands on.
Although the Passive House team at SPHC advised us against the use of rooflights as it’s not the norm for Passive House construction in Germany, we believed it was important for us to stick to the original concept of the top lit double height living space.
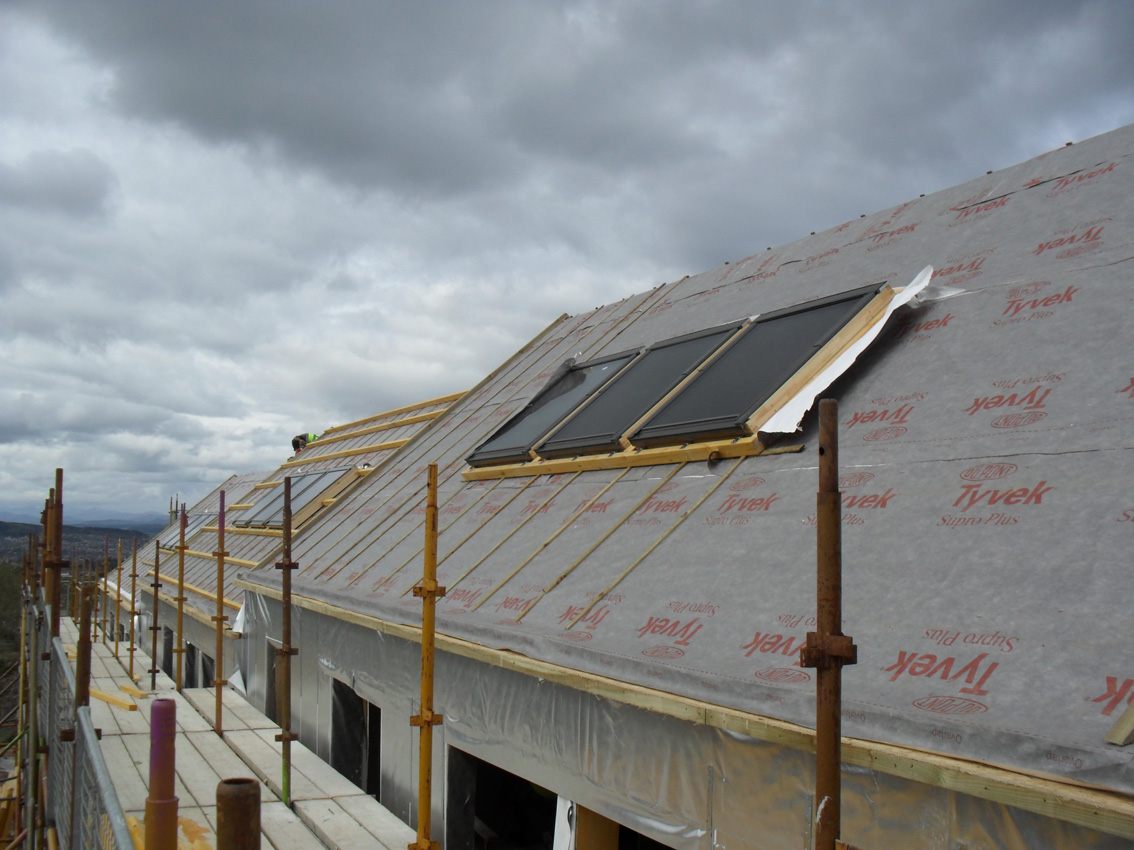
Roof and Wall Panels Wrapped in a Breather Membrane and Rooflights in Place
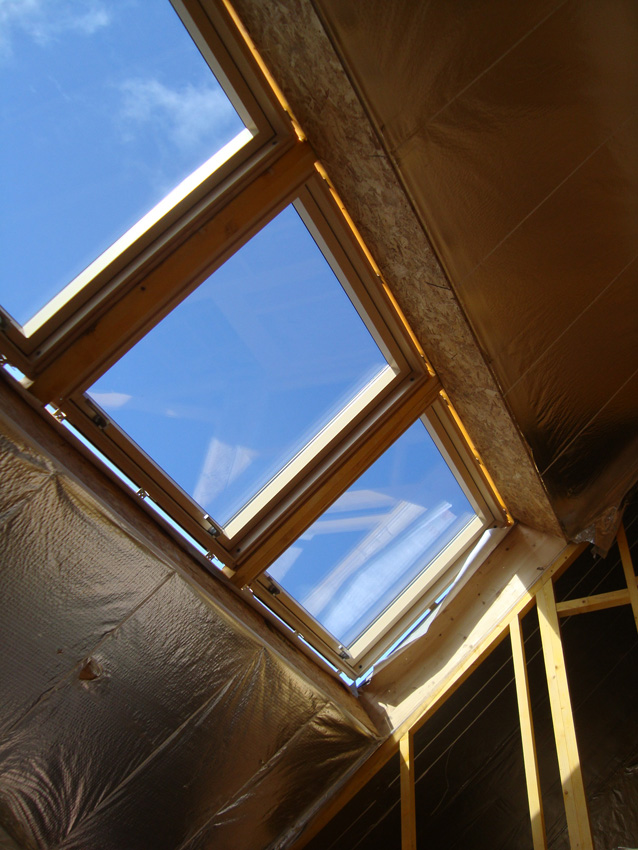
Rooflights from Inside – Additional Insulation and Airtight Seal still to be fixed in place
Our very first go at reviewing the scheme with the Passive House Planning Package (PHPP) software did show that the rooflights might cause us some problems with compliance due to the heat loss through them.
However, with some small adjustments to the external building fabric in order to increase the envelope U-Values the PHPP software showed that the incremental increase in insulation would allow us to achieve compliance with the roof lights remaining in place. Much like the other glazed elements we had to look carefully at the air seal and thermal bridging details at the roof light but by using an insulated kerb detail and using a similar air seal tape to the windows and timber frame joints we should successfully achieve the correct levels of air tightness with limited thermal bridging.
Stranded for two weeks in the Canary islands thanks to Iceland’s ash cloud, it seems all has gone well in my absence and progress has been swift. The intention now is to make a start on the timber cladding and roof sheeting ready for the arrival of the windows in early June.
Substructure
May 5th, 2010Through 11 sets of road works up the A9 we finally made it to site for our second site visit to find that the weather had been a little kinder to our team at O'Brien Properties and, with all of our concrete strip founds in place and two thirds of our sub-structure walls complete, we could start to appreciate the scale of our terrace and its relationship to some of the other units on adjacent plots.
For the sub-structure, we are using an Aerated concrete block to help significantly with our U-Values and thermal bridging. A common concrete block wall would not have provided us with sufficiently low thermal conductivity or indeed a suitable fixing base for the wide prefabricated timber panels which need to be anchored down to resist the significant wind loads experienced on such an exposed site. We did consider importing a unique German foundation system called 'Isoquick' which uses modular foam blocks to create a foam 'tub' into which the concrete slab can then be poured. It was ideal for Passive House construction but we couldn't satisfy ourselves that it could deal with the stepped profile of our terrace or more importantly the significant wind loads it had to withstand. We have however decided to do some more research into this product for our next Passive House project as it would minimise many of the cold bridging issues we have come across. In the end we went for the best solution available in the wide format Aerated blocks although I don't think we've been the brickie's best friends!
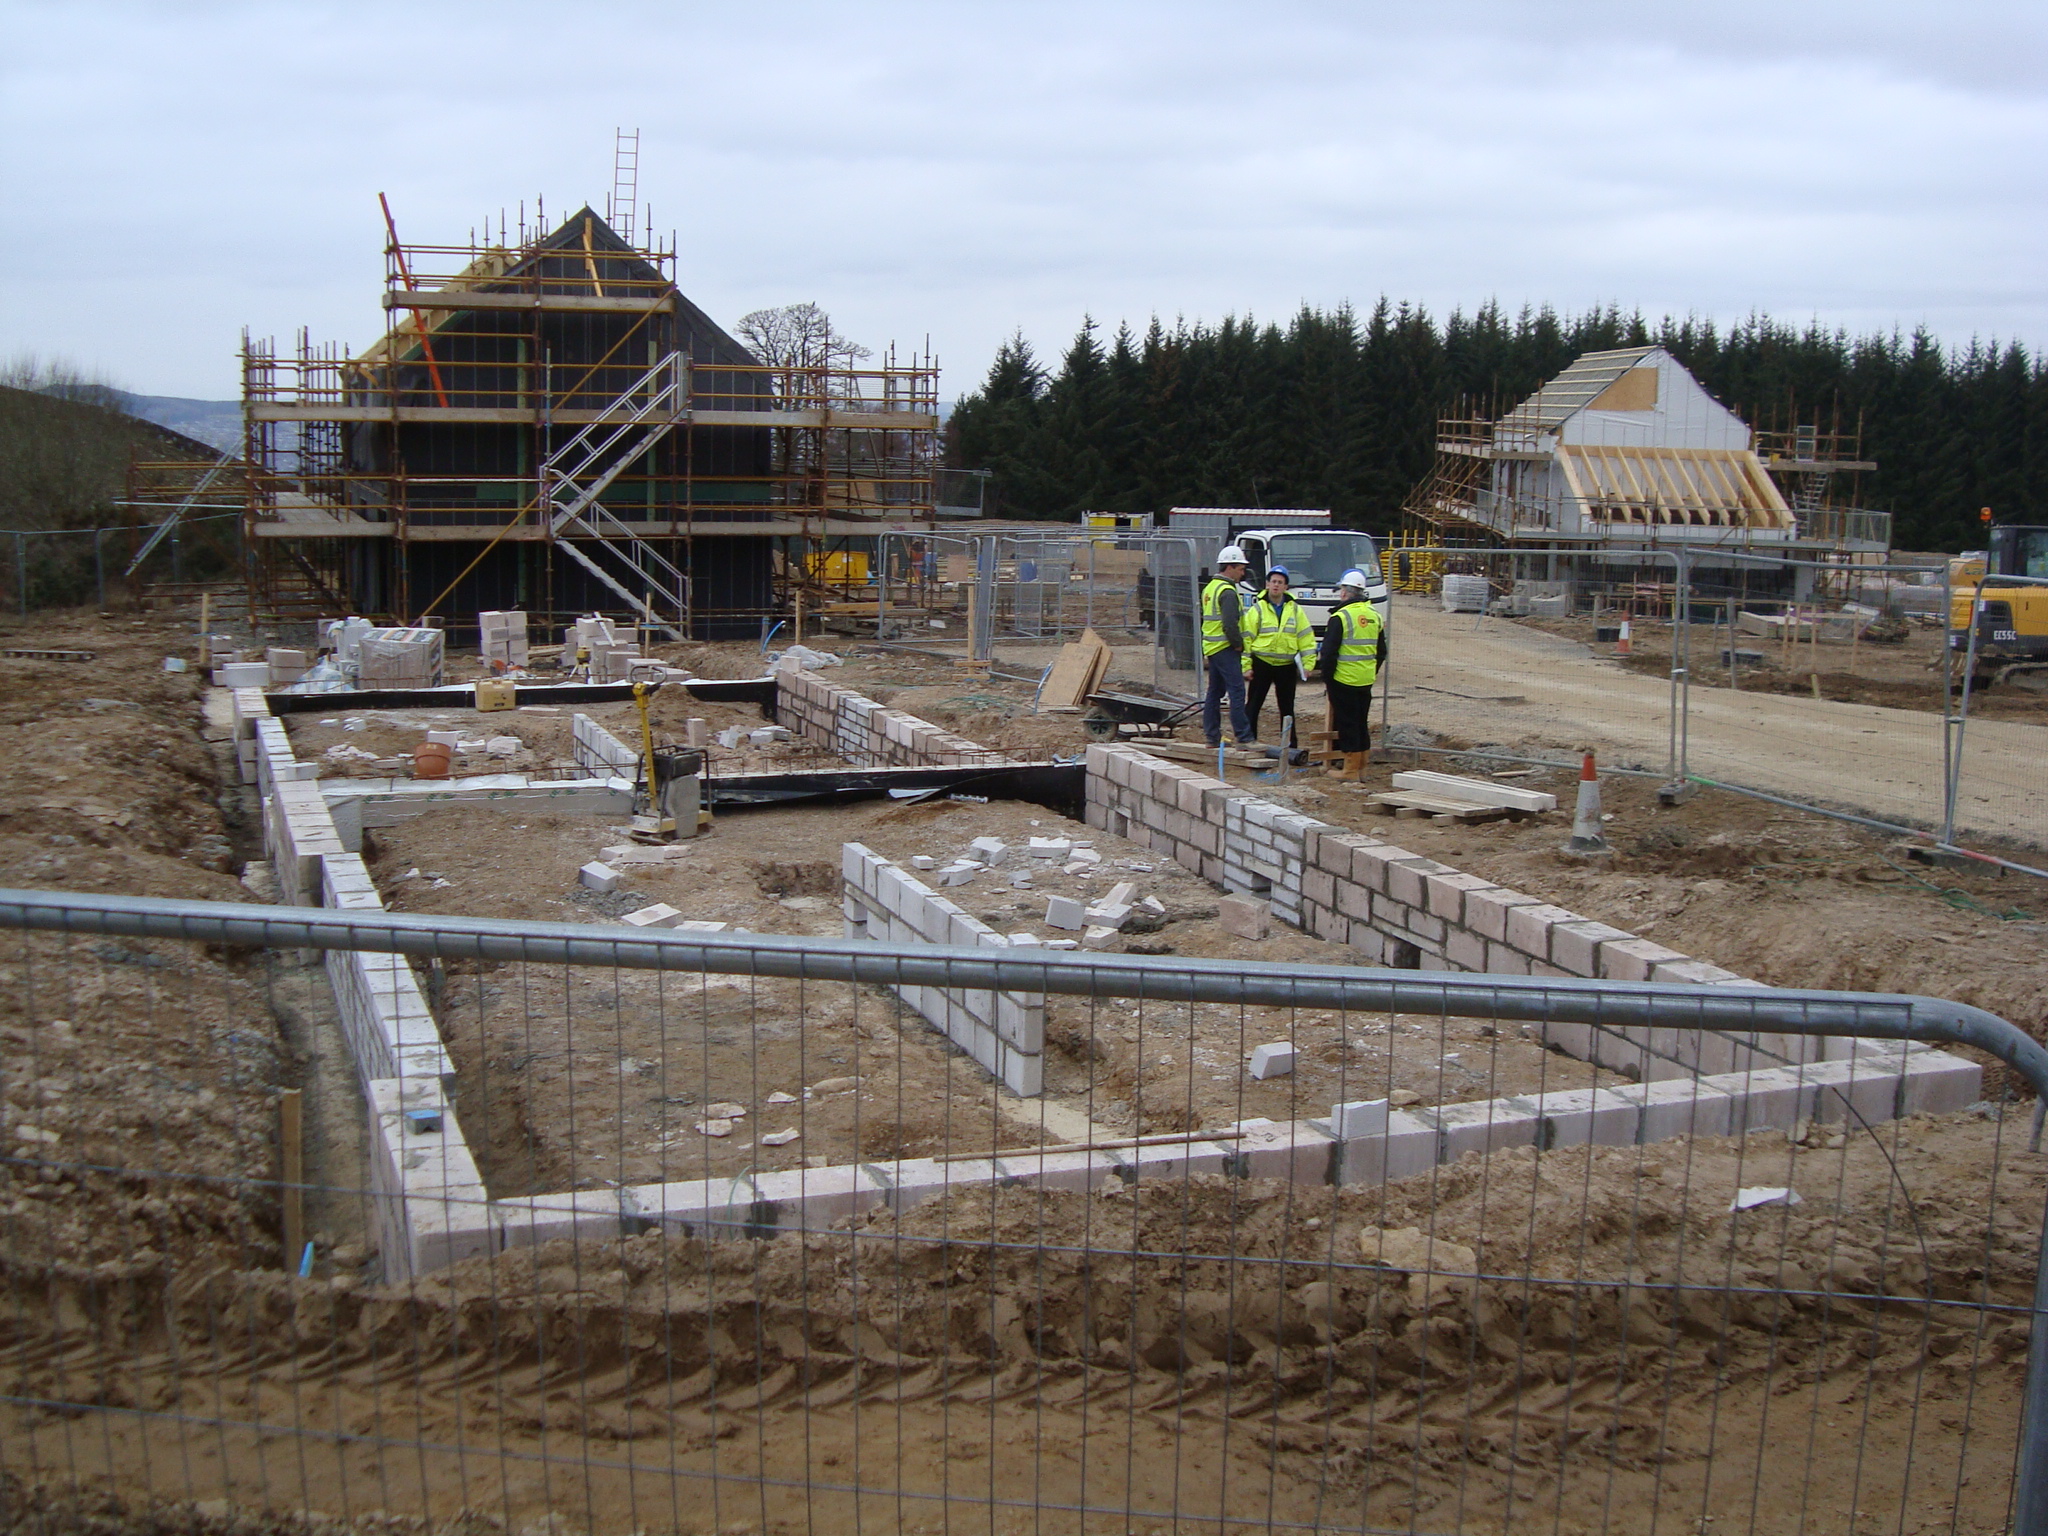
Blockwork on Plots 11/12
Given the stringent standards for thermal performance in Passive House construction we have had to accurately model every junction to understand and predict the heat loss of the buildings accurately. This was done in conjunction with the Scottish Passive House Centre using the Passive House Planning Package (PHPP) software, a widely accepted energy design tool for Passive Houses which is frequently updated with numerous years of experience from built Passive House projects. The tool itself is fairly complex but helped us to look at every heat loss and heat gain associated with thermal conductivity, thermal bridging, air-tightness, ventilation, solar gains and internal gains. PHPP very simply establishes a number of rules and conventions against which we can test our design. For us it simplifies the design process and the route towards the eventual Passive House certification. It's far more advanced and relevant than the current UK norm, the standard assessment procedure (SAP).
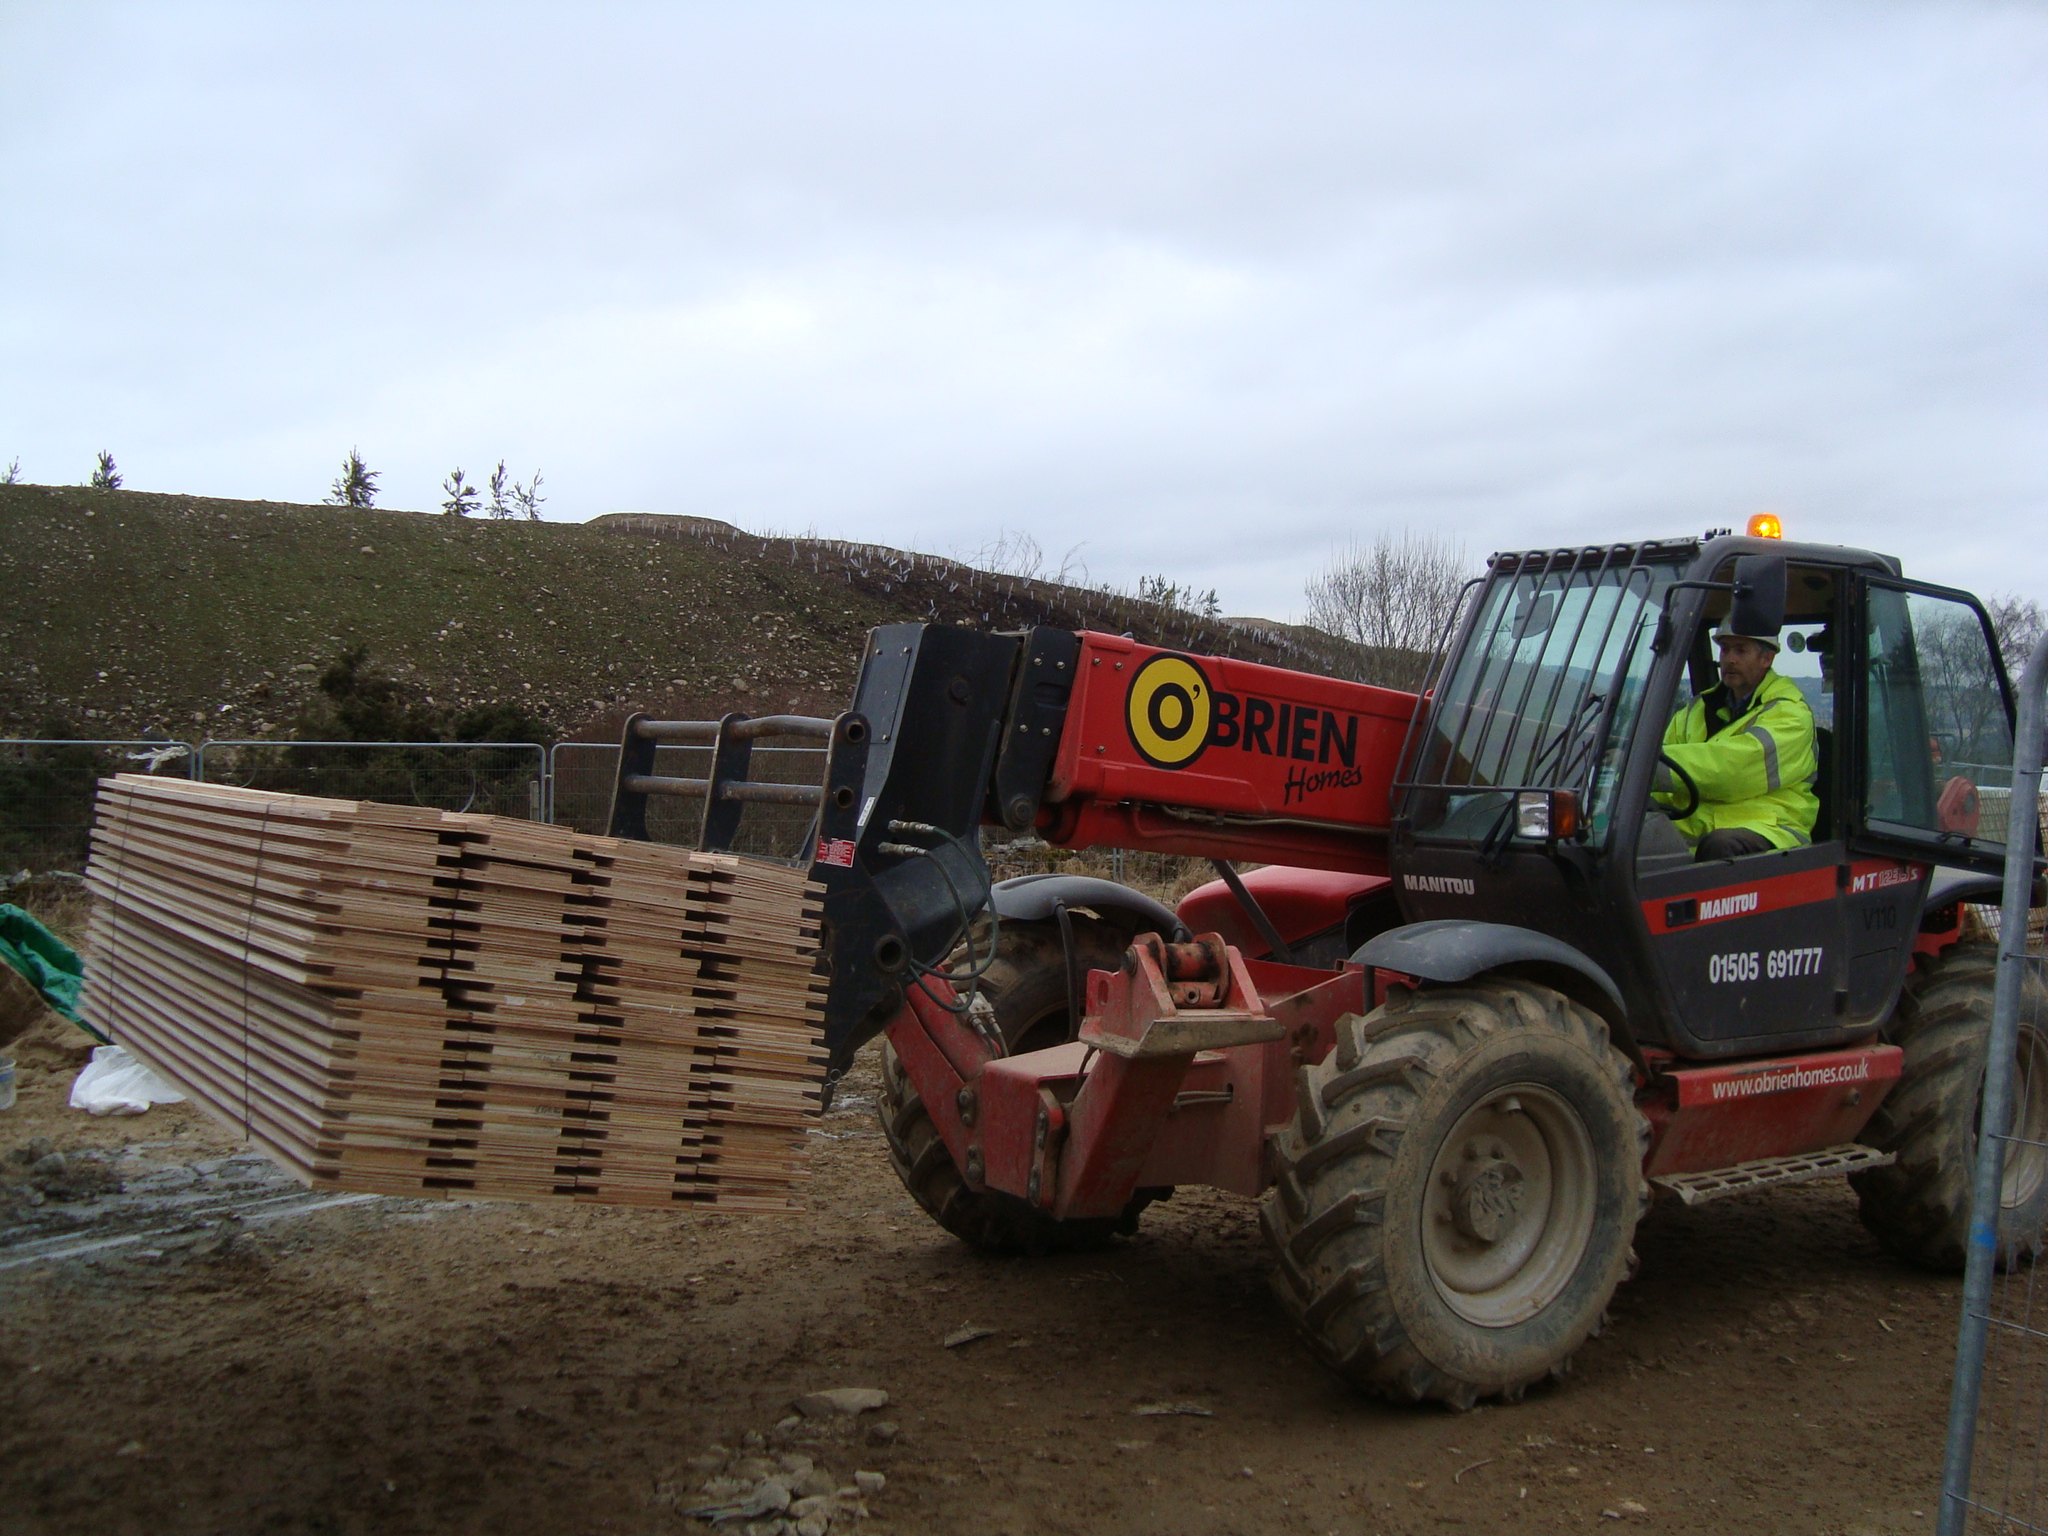
RTC have more or less finalised the manufacture of the timber frame panels with only the roof panels to complete and it looks like they will be ready for delivery within a few weeks. Whilst we were on site RTC made the first delivery of their patented Passive Wall Plates which act as wall plates for their Passive Wall system and help achieve significant air tightness in the wall panels. We have talked about the lead in times on the window delivery and have decided that the timber frame openings will need to be covered sufficiently to allow some first fix works internally to proceed. We also think we can also get the triple glazed roof lights in, the profiled roof sheeting on and some of the external wall cladding framing commenced before we absolutely need the windows and doors!
It looks like the block work will be complete this week with drainage in place by early next week and our insulation and concrete slab in place awaiting the Passive Wall panels by mid Month.
Progress varies around the site with most ground works underway and even some timber frames complete.
Passive Plate Delivery for Plots 11/12
Rural Design + James McQueen Builders - Plot 17
Andrew Black + William Gray Construction - Plot 4.2
Warmcell insulation being blown in on David Blaikie Architects Plot 4.3
Since our site visit however, the snow has returned and the site looks as though it's the middle of winter again. We can't believe the impact the weather has had on this project this year but everyone's still confident everything will be ready in time! I wonder if there's some snowmen being built just out of picture?!
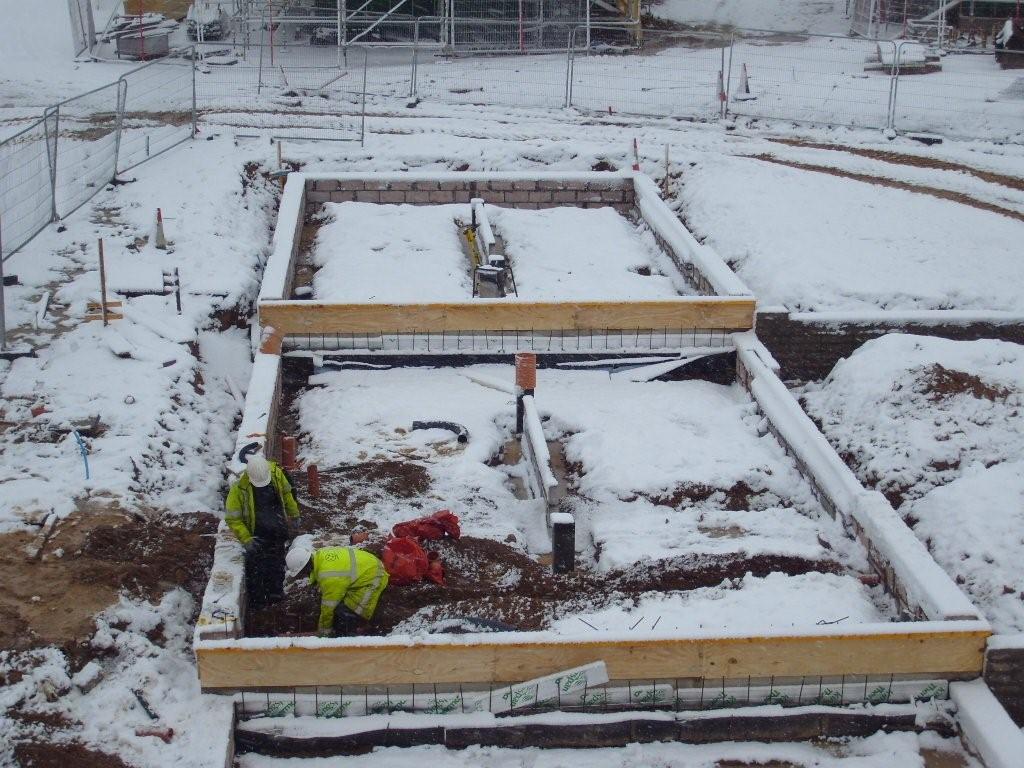
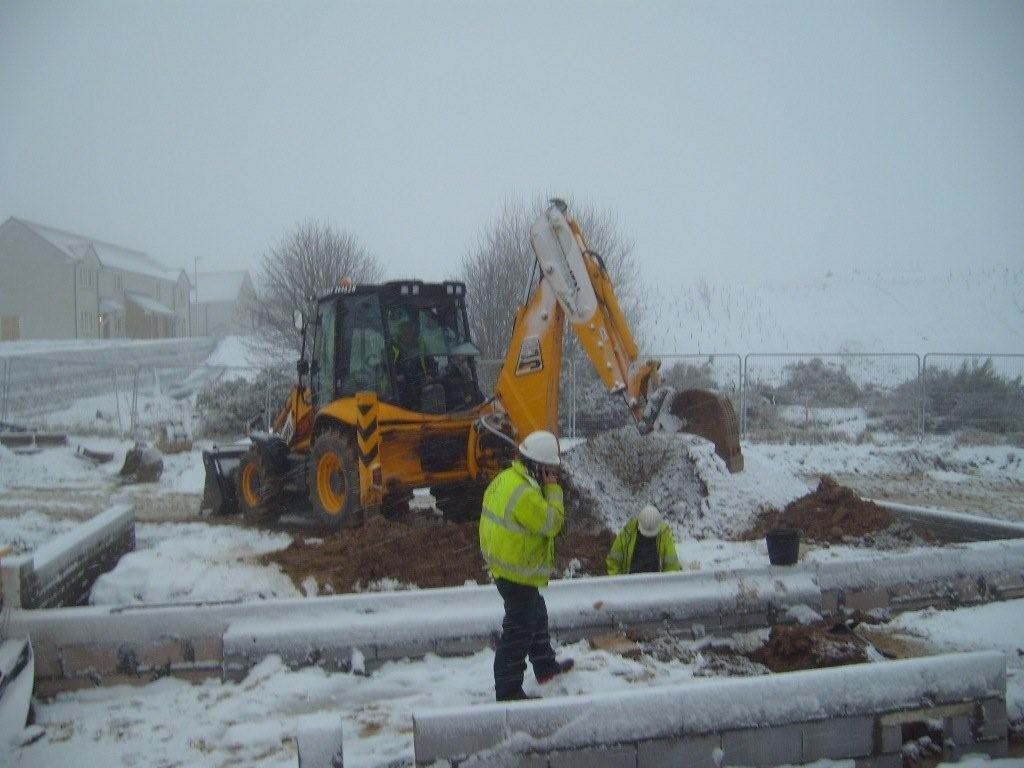
The Snow Returns!
